When you purchase through links on our site, we may earn an affiliate commission. Learn more..
How Does a Laser Engraver Work on Wood: Unveiling the Art
Wood engraving has been a popular art form for centuries, and with the advent of technology, laser engraving has become a game-changer in the industry. Laser engraving on wood offers precision, speed, and versatility, making it a preferred choice for many woodworking projects.
Recommended Best Laser Engraver for Wood 2024-2025
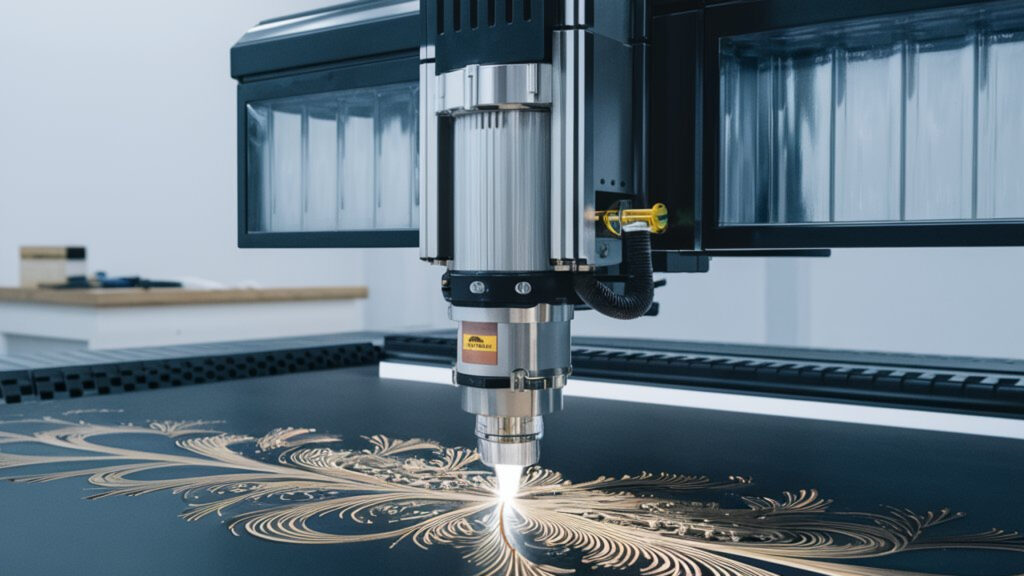
Laser engraving works by using a high-powered laser to burn or vaporize the surface of the wood, creating permanent marks or designs. The laser beam acts like a chisel, removing layers of material with high precision and speed. The process involves the following steps:
Preparation: Before beginning the engraving process, it is essential to prepare the wood. Ensure that the wood surface is sanded and smooth for optimal results.
Design Creation: The desired design or pattern is created using graphic design software on a computer.
Laser Engraving: The prepared wood is placed in the laser engraving machine, and the design file is sent to the machine’s computer. The laser then follows the pattern, burning or vaporizing the wood to create the design.
Finishing: Once the engraving is complete, the wood may undergo additional finishing processes, such as staining or clear coating, to enhance the appearance of the engraved design.
Understanding the Laser Engraving Process
When the laser beam from the engraving machine is focused on the wood, it exposes the material to a significant amount of heat. This heat causes the wood to burn or vaporize, resulting in the desired engraving. The precision and speed of the laser allow for intricate details and complex patterns to be engraved with remarkable accuracy.
Benefits of Laser Engraving on Wood
Laser engraving offers several advantages over traditional engraving methods:
Precision: The high level of precision offered by laser engraving allows for the creation of intricate and detailed designs on wood.
Speed: Laser engraving is significantly faster than traditional methods, making it an efficient choice for large-scale projects.
Versatility: Laser engraving can be used on various types of wood, offering flexibility in material choices for woodworking projects.
Customization: The ability to create custom designs and patterns makes laser engraving a popular choice for personalized wood products.
Starting a Laser Engraving Project
For those interested in laser engraving on wood, there are a few essential things to consider:
Equipment: A laser engraving or cutting machine is necessary for the engraving process. Additionally, graphic design software and a computer are required for creating and transferring design files to the machine.
Preparation: Proper preparation of the wood, including sanding and finishing, is crucial for achieving high-quality engravings.
Training: Familiarizing oneself with the operation of the laser engraving machine and the associated software is essential for successful wood engraving projects.
Laser Engraver
How to Use a Laser Engraver for Wood: Expert Tips
To use a laser engraver for wood, start by ensuring that the wood is sanded and smooth. Stain and clear coat the wood before engraving to achieve a high-quality result.
It is recommended to stain the wood before laser engraving, but make sure to allow enough time for the stain to dry if it is oil-based or petroleum-based. Preparing the wood properly is crucial for achieving a professional wood engraving.
Once the wood is prepared, you can proceed with using the laser engraver to create your desired designs or patterns. By following these steps, you can easily utilize a laser engraver for wood engraving projects.
Choosing The Right Wood
If you want to achieve a quality, professional wood engraving, it is important to make the proper preparations. Before starting, carefully examine the wood to ensure it is sanded and smooth. Additionally, staining and clear coating the wood before engraving can enhance the final result. This step ensures that the engraving stands out and creates a visually appealing finish. By following these guidelines, you can maximize the effectiveness of your laser engraver for wood projects.
Pre-engraving Steps
If you want to achieve a quality wood engraving, it is crucial to ensure that the wood is smooth and sanded. It is also important to stain and clear coat the wood before proceeding with the engraving process. When using oil-based or petroleum-based stains, it is essential to allow sufficient drying time before laser engraving to prevent any adverse effects on the final outcome.
Setting Up Your Laser Engraver
To set up your laser engraver for wood, begin by ensuring the wood is sanded and smooth. Stain and clear coat the wood before engraving to achieve a quality finish. Familiarize yourself with the machine and materials, and with practice, laser engraving on wood will become easy to master.
Setting Up Your Laser Engraver
To use a laser engraver for wood, first ensure the wood is smooth and stained. Understand your machine capabilities and materials for best results. Install required software and configure settings accordingly.
Understanding Your Machine
Familiarize yourself with the features of your laser engraver. Learn about speed and power settings for different types of wood. Test engrave to adjust settings for optimal outcomes.
Software Installation and Configuration
Follow manufacturer’s instructions for software installation. Configure software settings based on desired engraving effects. Ensure compatibility with your laser engraver model.
Safety First
When using a laser engraver for wood, it is important to prioritize safety. Wearing the appropriate personal protective equipment (PPE) is crucial to prevent any potential injuries. This includes safety goggles to protect your eyes from the laser beam, as well as gloves to protect your hands. Additionally, ensure that you are working in a well-ventilated area to avoid inhaling any fumes or smoke produced during the engraving process.
Laser Engraver Settings
When it comes to using a laser engraver for wood, laser engraver settings are crucial for achieving the desired result. It’s important to choose the right speed, power, and frequency settings based on the type of wood and the design you want to engrave.
Properly prepping the wood with sanding, staining, and clear coating can also help ensure a professional finish.
To achieve the perfect wood engraving using a laser engraver, it is crucial to adjust the speed and power settings accordingly. While testing the engraving on a scrap piece of wood, start by adjusting the power to ensure that it is not too weak or too strong. Then, adjust the speed to find the right balance between the engraving’s accuracy and speed. It’s important to note that different types of wood may require different laser settings, so it’s best to experiment with different settings until you find the perfect one. Test engraves can also help determine the ideal settings for a particular project. Remember to prepare the wood by sanding it and staining and clear coating it before engraving to achieve a professional-looking result.
The Engraving Process
How to Use a Laser Engraver for Wood
Before initiating the engraving process, ensure that your wood is securely positioned within the laser engraver. This will prevent any potential slippage or misalignment during the engraving operation.
Throughout the engraving process, it is essential to actively monitor the operation to ensure that the wood is being engraved accurately and consistently. This involves observing the depth and precision of the engraving as it progresses.
Project Ideas
Learn how to use a laser engraver for wood with these helpful project ideas. Discover the proper preparations, including sanding and staining the wood, to achieve quality and professional engravings. Laser engraving is easy to learn with practice and understanding the basics.
Project Ideas
Making a Signboard: Create unique signs for home decor.
Engraving a Chopping Board: Personalize kitchen tools with intricate designs.
Photo Engraving Techniques: Preserve memories by engraving photos on wood.
Post-engraving Steps
After engraving wood with a laser, the post-engraving steps involve cleaning off any residue, inspecting the engraving for quality, and applying a protective finish to enhance the design and durability of the wood. These steps ensure a professional and lasting result for your laser-engraved wood projects.
After completing the engraving process, clean the wood surface thoroughly to remove any residue.
Apply a wood finish or sealant to protect the engraving and enhance the overall appearance.
Troubleshooting Common Issues
To troubleshoot common issues when using a laser engraver for wood, ensure the wood is sanded and smooth before engraving. Stain and clear coat the wood properly before starting the engraving process to achieve a professional and high-quality result. For optimal outcomes, use the correct laser settings and allow adequate drying time for oil-based stains.
When aligning the laser, ensure it is accurately positioned for precise engraving.
Adjust settings for different wood types to achieve optimal engraving results.
Advanced Tips And Tricks
Discover advanced tips and tricks on how to effectively use a laser engraver for wood. Learn about the proper preparations, such as sanding and staining the wood, and explore different techniques for achieving quality, professional results. With practice and understanding of the basics, laser engraving can be easy to learn and master.
To achieve precise results when engraving wood with a laser, it is crucial to optimize Vector Cut Settings. Adjust the power and speed settings to ensure clean cuts and fine details. Experiment with different settings to find the ideal balance for Creating Detailed Artworks.
Frequently Asked Questions
What Do You Put On Wood Before Laser Engraving?
Before laser engraving wood, ensure it is sanded, smooth, stained, and clear-coated for quality results.
How Thick Of Wood Can A Laser Engraver Cut?
A laser engraver can cut wood up to a thickness of about 1/4 inch.
What Do I Need To Start Laser Engraving?
To start laser engraving, you need a laser engraving machine, training, a computer, and graphic design software. The machine performs the engraving while the computer gives instructions. It’s easy to operate and a great skill to learn.
Is It Hard To Operate A Laser Engraver?
Operating a laser engraver is not hard; it’s simple and can be easily taught to others for engaging projects. Understanding the process is key to starting your projects successfully.
Conclusion
Laser engraving has revolutionized the art of wood engraving, offering unparalleled precision, speed, and versatility. Whether creating custom designs, intricate patterns, or personalized wood products, laser engraving on wood continues to be a popular choice for woodworking enthusiasts and professionals alike.