Soldering automotive wiring can seem daunting. But it’s a skill worth learning.
Recommended Best Soldering Iron 2025
| Recommendation | Product |
| Best Overall | YIHUA 926 III 60W LED Display Soldering Iron Station |
| Popular Choice | KYZHXVO Soldering Iron |
| Best Value | KEPLOG Soldering Iron Kit |
| Best Budget | plusivo Soldering Iron Kit |
| Another Excellent Pick | MEAKEST Digital Soldering Iron station Kit |
Mastering this can save time and money on car repairs. Plus, it ensures a secure and long-lasting connection for your vehicle’s electrical system. In this guide, we’ll walk you through each step of the soldering process. We’ll cover everything from selecting the right tools to ensuring safety.
Whether you’re a beginner or have some experience, this guide will help you achieve professional results. Understanding the basics and following the correct procedures can make all the difference. So, let’s dive in and explore how to solder automotive wiring safely and efficiently. By the end, you’ll be equipped with the knowledge to tackle any wiring project with confidence.
Introduction To Soldering Automotive Wiring
Soldering automotive wiring is a crucial skill for anyone working on vehicle electrical systems. It ensures a reliable connection, preventing issues that could arise from poor wiring. This guide will walk you through the basics of soldering automotive wiring safely. Whether you’re a beginner or need a refresher, understanding these fundamentals is essential.
Importance Of Proper Soldering
Proper soldering creates a solid electrical connection. This is vital for vehicle safety and performance. Without it, electrical components may fail. Improperly soldered wires can lead to short circuits, causing potential damage or hazards.
Proper soldering also prevents corrosion. This extends the lifespan of your vehicle’s electrical system. Ensuring a clean and strong connection helps maintain consistent electrical flow. It avoids the risk of intermittent connections that can cause annoying or dangerous issues.
Common Applications
Soldering automotive wiring has many applications. It is used in repairing or replacing damaged wires. It is also essential for installing new electrical components. This includes car stereos, alarms, and additional lighting.
Another common use is in creating custom wiring harnesses. This allows for more organized and efficient electrical systems. Whether upgrading your vehicle or performing maintenance, soldering is a valuable skill.
Essential Tools And Materials
Having the right tools and materials is crucial for safe and effective soldering of automotive wiring. Using subpar equipment can lead to poor connections and potential hazards. This section will guide you through the must-have tools and recommended materials for this task.
Must-have Soldering Tools
A quality soldering iron is essential. Choose one with adjustable temperature settings. This allows you to control the heat. A soldering iron stand is also important. It keeps the hot iron safe when not in use.
Wire strippers are necessary for removing insulation from wires. They make the job easier and prevent damage to the wire. Soldering flux helps clean the wires and improves the connection. It ensures the solder flows smoothly.
Safety glasses protect your eyes from splashes and debris. Heat shrink tubing covers the soldered joints. It provides insulation and protection. A multimeter checks the connections for continuity. It ensures they are properly soldered.
Recommended Materials
Use lead-free solder for safer and environmentally friendly connections. It is less harmful and works well for automotive wiring. Rosin-core solder is also effective. It contains flux within the solder.
Choose quality automotive wires. They should be the right gauge for your application. Good quality wires ensure reliable connections. Electrical tape can be used for additional insulation. It provides an extra layer of protection.
Keep a clean workspace. Have a fire-resistant mat to work on. It minimizes the risk of accidents. Proper lighting helps you see clearly. It ensures precise work.
Preparing The Work Area
Proper preparation is crucial for safe and effective soldering of automotive wiring. By setting up your workspace correctly, you can avoid accidents and ensure quality work. This section provides detailed steps on how to prepare your work area before soldering.
Safety Precautions
Safety should always be your top priority. Wear protective gloves to avoid burns from hot solder. Use safety glasses to protect your eyes from solder splashes. Ensure your workspace is well-ventilated to avoid inhaling fumes. Keep a fire extinguisher nearby in case of emergencies.
Organizing Your Workspace
Begin by clearing your work area of clutter. Place all necessary tools within reach. Arrange your soldering iron, solder, flux, and wire cutters on your workbench. Use a non-conductive mat to prevent short circuits. Make sure there’s adequate lighting to see your work clearly.
Label your wires and connectors for easy identification. Keep a trash bin close to dispose of waste materials. Use trays or containers to hold small components. This helps keep your workspace tidy and organized.
Wire Preparation Techniques
Soldering automotive wiring requires precision and safety. Proper wire preparation ensures a strong and reliable connection. This section covers the essential steps for preparing wires. Follow these techniques to achieve safe and effective results.
Stripping The Insulation
Begin by stripping the insulation from the wire. Use a wire stripper tool for this task. Place the wire into the correct notch on the tool. Gently squeeze the handles and pull the tool away from the wire. This removes the insulation without damaging the wire strands.
Ensure you strip enough insulation to expose the wire. About half an inch is often enough. This allows for a solid connection during soldering. Avoid cutting too deep into the wire. Damaging the strands can weaken the connection.
Cleaning The Wire
Cleaning the wire is crucial. This removes any dirt, oil, or oxidation. Use a small piece of sandpaper or a wire brush. Gently clean the exposed wire ends. Ensure the wire is shiny and free from contaminants.
Clean wires improve solder adhesion. This leads to a stronger and more reliable connection. Take the time to clean each wire properly. This step ensures the best results for your soldering project.
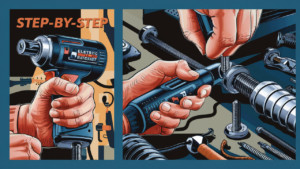
Soldering Process Steps
Soldering automotive wiring ensures a strong connection. This step-by-step guide will help you solder safely. Let’s dive into the soldering process steps.
Tinning The Iron
First, plug in the soldering iron and let it heat up. Wait for a few minutes until it reaches the required temperature. Clean the tip with a damp sponge. This removes any dirt or oxidation. Next, apply a small amount of solder to the iron’s tip. This is called tinning. It helps with heat transfer and makes soldering easier. Ensure the tip is shiny.
Applying Solder
Hold the tinned soldering iron against the wire. Heat the wire for a few seconds. Then, touch the solder to the wire. The solder should melt and flow into the wire. Remove the soldering iron and let the joint cool. Do not move the wire while it cools. This ensures a strong connection. Check the joint. It should be shiny and smooth. If it’s dull or cracked, reheat and add more solder.

Securing And Insulating Connections
Learn how to solder automotive wiring safely with our step-by-step guide. Ensure connections are secure and insulated properly. Improve your vehicle’s reliability and performance.
Securing and insulating connections in automotive wiring is crucial for ensuring the longevity and safety of your electrical systems. Properly secured and insulated connections prevent short circuits, corrosion, and other potential hazards. Let’s dive into two essential methods for securing and insulating these connections effectively.
Using Heat Shrink Tubing
Heat shrink tubing is a fantastic tool for insulating and protecting your soldered connections.
Start by sliding a piece of heat shrink tubing over one of the wires before soldering. Ensure the tubing is long enough to cover the soldered joint completely.
Once you’ve finished soldering, slide the tubing over the joint. Use a heat gun or lighter to shrink the tubing, creating a tight seal around the connection. This not only insulates the joint but also adds mechanical strength.
Have you ever had a wire come loose because it wasn’t properly protected? Heat shrink tubing can prevent such issues.
Applying Electrical Tape
Electrical tape is another common method for securing and insulating connections. While it might seem simple, there’s a right way to do it.
After soldering, wrap the connection with electrical tape. Start slightly before the soldered joint and continue wrapping until you’ve covered a bit beyond it. Ensure each layer overlaps the previous one by half the width of the tape.
This method provides a flexible and durable insulation layer. However, be cautious in high-temperature areas, as tape can degrade over time.
Have you ever noticed a sticky residue after removing old electrical tape? This happens when it’s been exposed to heat or moisture for too long. Regularly check and replace tape in critical areas.
By using these methods, you can ensure your automotive wiring connections are both secure and well-insulated. Which method do you find more reliable for your projects?
Securing and insulating connections doesn’t have to be complicated. With heat shrink tubing and electrical tape, you can achieve professional-level results.
Troubleshooting Common Issues
Even with the best preparation, issues can arise when soldering automotive wiring. Understanding these problems and knowing how to fix them ensures a successful and safe repair. Let’s dive into common issues and how to troubleshoot them effectively.
Cold Solder Joints
Cold solder joints occur when the solder doesn’t melt properly, resulting in weak connections. They often look dull or grainy.
To fix this, ensure your soldering iron is hot enough. Touch the iron to the joint for a few seconds longer to allow the solder to flow and bond correctly.
Check your work closely. A shiny, smooth joint indicates a good connection. Always inspect your joints to avoid future headaches.
Overheating Problems
Overheating can damage wires and components, leading to more extensive repairs. Signs include melted insulation or burnt smells.
To prevent overheating, use a soldering iron with an appropriate wattage for automotive wiring. A 25-40 watt iron is usually sufficient.
Work quickly but carefully. Practice makes perfect, so don’t be discouraged if you need several attempts to get it right.
What challenges have you faced while soldering automotive wiring? Share your experiences and tips in the comments below.
Expert Tips And Best Practices
Soldering automotive wiring can be a daunting task, especially if you’re new to it. However, with the right tips and best practices, you can ensure a safe and effective soldering experience. Let’s dive into some expert advice to make your connections reliable and durable.
Maintaining Your Tools
Having the right tools is crucial for successful soldering. Ensure your soldering iron is in good condition.
Regularly clean the tip with a damp sponge to remove oxidation. A clean tip ensures better heat transfer and smoother soldering.
Store your tools in a dry place to avoid rusting. Proper maintenance of your tools will significantly impact the quality of your work.
Ensuring Longevity Of Connections
Making sure your soldered connections last is key. Use quality solder with a rosin core to enhance bonding.
Don’t just rely on solder; crimp connectors can provide added strength. Wrap the connection with heat shrink tubing to protect against moisture.
Consider the environment your wiring will be exposed to. Are they in a high-vibration area? If so, ensure additional support to prevent wear and tear.
Have you ever had a connection fail after a few months? It’s frustrating and can be dangerous. Following these tips can prevent such issues.
Take a moment to inspect your work. A solid connection now saves you time and headaches later. Always remember: a bit of extra effort upfront leads to a safer and more reliable wiring system.
Frequently Asked Questions
How To Solder A Wire Step By Step?
1. Strip the wire ends using a wire stripper. 2. Twist the wire strands tightly. 3. Heat the soldering iron. 4. Apply solder to the iron tip. 5. Heat the wire and apply solder until it flows smoothly. 6. Let the solder cool and solidify.
How Do You Solder Car Electrical Wires?
Strip the wire ends and twist them together. Apply flux to the joint. Heat with a soldering iron. Touch solder to the heated joint until it flows. Let it cool.
What Do You Put On Wires Before Soldering?
Apply flux on wires before soldering. Flux cleans the metal surfaces and ensures a strong, reliable connection.
Why Not To Solder Automotive Wires?
Soldering automotive wires can lead to brittle connections. Vibration and movement may cause breaks. Use crimp connectors for better durability.
Conclusion
Soldering automotive wiring safely is vital for vehicle performance. Following this step-by-step guide ensures secure connections. Practice safety measures to avoid accidents. Use quality tools for the best results. Double-check your work to prevent issues. Stay patient and take your time.
Proper soldering extends the lifespan of your vehicle wiring. Happy soldering and safe driving!