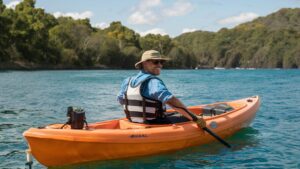
Solo vlogging on the move can be challenging. You want smooth footage and perfect framing.
Recommended Best Vlogging Camera 2025
| Recommendation | Product |
| Best Overall | DJI Osmo Action 4 Essential Combo |
| Popular Choice | DJI Pocket 2 |
| Best Value | Muraux 8K Camcorder |
| Best Budget | SJCAM C300 Pocket Camera 4K |
| Another Excellent Pick | DJI Osmo Action 3 Creator Combo |
Capturing great videos alone requires skill and the right tools. Flip-screen angles and stabilization techniques can help you get those perfect shots. With a flip-screen, you can see yourself while recording. This ensures you stay in frame. Stabilization helps keep your video smooth, even if you’re moving.
These tools make your vlogging look professional. In this blog, we will explore how to use flip-screens and stabilization. You will learn techniques to improve your vlogs. Let’s dive in and make your solo vlogging journey easier and more fun!
Flip-screen Benefits
Flip-screen angles help solo vloggers frame shots perfectly. This ensures steady and clear visuals even on the move. Stabilization features keep footage smooth and professional.
### Flip-Screen Benefits
Flip-screens have revolutionized the world of solo vlogging. They allow you to see yourself while you record, making it easier to create high-quality content. Let’s dive into some key benefits.
Enhanced Self-framing
One major benefit is enhanced self-framing. With a flip-screen, you can see exactly what your viewers will see. This means you can adjust your position, lighting, and background in real time.
Imagine hiking up a scenic trail. You can make sure the beautiful landscape is captured perfectly behind you. No more guessing if you’re in the frame.
Real-time Feedback
Another advantage is real-time feedback. You can instantly see if something is off. Is there a distracting element in the background? Fix it right away.
Consider a personal experience: I was once recording a cooking vlog. Halfway through, I noticed on my flip-screen that my face was partially out of the frame. Without the flip-screen, I would have wasted valuable time and ingredients.
Real-time feedback also helps with focus. If the camera loses focus, you can readjust immediately. This ensures your videos are always sharp and professional.
These benefits make flip-screens a must-have for solo vloggers. They offer practical solutions to common vlogging challenges. Have you tried using a flip-screen yet? How has it changed your vlogging game?
Choosing The Right Angle
Solo vloggers need to find the right flip-screen angle for clear framing. Good angles and stabilization ensure smooth, engaging videos.
Choosing the Right Angle
When it comes to solo vlogging on the move, choosing the right angle is crucial. It can make a big difference in how your audience perceives your content. A well-chosen angle can add depth, engagement, and a personal touch to your videos.
Eye-level Shots
Eye-level shots are your go-to for creating a connection with your audience. This angle mimics natural conversation, making viewers feel like you’re speaking directly to them.
Use the flip-screen to ensure your eyes are level with the camera. This trick keeps your audience engaged and makes your video feel more personal.
When vlogging outside, adjust the height of your camera to your eye level. This small adjustment can significantly improve your video quality.
Dynamic Lower Angles
Lower angles add a sense of dynamism to your vlogs. They can make your videos look more creative and interesting. Use lower angles to showcase a different perspective.
For instance, if you’re capturing a bustling street, a lower angle can highlight the hustle and bustle effectively. It can also be useful for showcasing your activities, like hiking or skateboarding, from a unique viewpoint.
Remember, the flip-screen will help you frame these shots correctly. Ensure the camera is steady using a tripod or a stabilizer to avoid shaky footage.
Choosing the right angle isn’t just about aesthetics. It’s about engaging your audience and telling your story effectively. What angles will you experiment with in your next vlog?
Stabilization Techniques
As a solo vlogger on the move, ensuring your footage is stable can make or break your video quality. Shaky footage can distract your viewers and diminish the professional feel of your content. Here are some practical stabilization techniques to help you capture smooth and engaging videos.
Using Gimbals
A gimbal is a fantastic tool for stabilizing your camera. It uses motors to counteract unwanted movements, providing incredibly smooth footage even when you’re walking or running.
Investing in a gimbal can significantly enhance your videos. It allows you to focus on your content without worrying about shaky hands.
I remember shooting a vlog on a busy street; the gimbal kept the footage steady despite the crowd and my constant movement. It made the editing process much smoother too.
Have you tried using a gimbal yet? It might be the missing piece in your vlogging setup.
Handheld Stabilization
If you don’t have a gimbal, don’t worry. You can still achieve stable footage with handheld techniques. Hold your camera with both hands, keeping your elbows close to your body to minimize shake.
Bending your knees slightly while walking can also help absorb the shock and reduce motion blur. This technique is especially useful when you’re on the move and need to capture spontaneous moments.
When I started vlogging, I didn’t have access to fancy equipment. Simple techniques like these kept my footage stable enough to engage my audience.
Do you have any handheld stabilization tricks that work for you? Feel free to share in the comments below.
Using these stabilization techniques can elevate your video quality and keep your viewers glued to your content. Try them out and notice the difference they make!
Lighting Considerations
Proper lighting ensures clear and vibrant video quality. It helps highlight your subject and reduce shadows, enhancing the overall viewing experience.
When you’re vlogging on the move, lighting can make or break your video quality. Proper lighting ensures that your viewers see you clearly and that your content looks professional. Here, we’ll discuss some essential lighting considerations for solo vloggers.
Natural Light Usage
Natural light is your best friend. It’s free, and it creates a beautiful, soft effect. The golden hours—just after sunrise and just before sunset—offer the best natural light.
Position yourself facing the light source. This can be a window, an open door, or even the sun. This way, the light will illuminate your face evenly.
Be mindful of shadows. If the light is too harsh, it can create unflattering shadows. Consider using a white cloth or curtain to diffuse the light.
Portable Lighting Solutions
Sometimes, natural light isn’t available or sufficient. This is where portable lighting solutions come in handy.
Ring lights are popular because they provide even lighting. You can attach them to your camera or phone. They are lightweight and easy to carry.
LED panels are another great option. They offer adjustable brightness and color temperature. You can attach them to a tripod for hands-free use.
Consider battery life. Choose lights with long battery life to avoid interruptions during your shoot. Rechargeable options are ideal for vlogging on the go.
Have you ever struggled with poor lighting during your vlogs? What portable lighting solutions have worked best for you? Share your thoughts and experiences in the comments below!
Audio Quality
High-quality audio is vital for solo vloggers. Viewers often tolerate poor video, but bad audio can drive them away. Clear sound makes your content engaging and professional.
Let’s explore ways to improve your audio quality while on the move.
External Microphones
Built-in camera microphones often lack clarity. They pick up unwanted noise and sound distant. An external microphone offers better sound quality. Clip-on lavalier mics are portable and effective. Shotgun mics focus on sound directly in front of the camera.
Choose a mic that suits your vlogging style. Ensure it is compatible with your equipment.
Wind Noise Reduction
Wind noise can ruin outdoor vlogs. It makes your audio harsh and hard to understand. Use a windscreen or a dead cat cover to reduce wind noise. These accessories are affordable and easy to attach. You can also shield the mic with your body or find a sheltered spot.
Test different methods to see what works best for you.
Background And Environment
Creating engaging content as a solo vlogger can be challenging. The background and environment play a crucial role in capturing your audience’s attention. The right setting can make your videos more captivating and professional.
Choosing Scenic Locations
Pick locations that are visually appealing. Scenic spots can enhance your video’s aesthetic. Parks, beaches, and cityscapes offer great backgrounds. Natural lighting in these areas can also improve video quality. Look for unique spots that align with your content’s theme.
Minimizing Distractions
Ensure your background does not distract from your message. Avoid busy areas with heavy traffic or loud noises. Simple, clean backgrounds keep the focus on you. Check for unwanted elements in the frame before you start recording.
Editing Tips
Editing your vlogs can be a daunting task, especially for solo vloggers. Yet, a few editing tips can make your videos look more professional. From cutting unsteady footage to color correction, small tweaks can enhance your content.
Cutting Unsteady Footage
Unsteady footage can distract your viewers. Always cut shaky parts. Use software like Adobe Premiere Pro or iMovie. These tools have stabilization features. Apply them to smooth out the clips. Keep your shots steady and focused.
Color Correction
Color correction makes your video look vibrant. Adjust the brightness and contrast first. Make sure the colors look natural. Use software tools like DaVinci Resolve or Final Cut Pro. These tools offer advanced color grading options. Enhance the visual appeal of your vlogs.
Practice And Experimentation
As a solo vlogger on the move, perfecting your framing techniques can make a huge difference in your content. Practice and experimentation are key to mastering flip-screen angles and stabilization. By continually trying out new methods and tools, you can find what works best for you and keep your audience engaged.
Trying Different Angles
Experiment with different camera angles to see what captures the best shot. Use your flip-screen to test close-ups, wide shots, and everything in between. Notice how each angle affects the mood and clarity of your video.
When I first started vlogging, I realized a lower angle made my videos more dynamic. It added a unique perspective that my viewers loved. Keep adjusting and testing until you find the angles that highlight your content the best.
Don’t be afraid to get creative. Try holding your camera above your head, at waist level, or even placing it on the ground. Variety in your shots can add a professional feel to your vlogs. What unconventional angle can you try next?
Testing Stabilization Tools
Stabilization is crucial when you’re constantly moving. Shaky footage can distract your viewers. Invest in tools like gimbals or tripods to keep your shots steady.
Once, I tried a gimbal for the first time and noticed a remarkable improvement in my video quality. It allowed for smooth transitions and stable footage even while walking. These tools can be game-changers for your vlogs.
Test different stabilization options to see which one fits your style. Sometimes, even a simple hand-held stabilizer can make a big difference. What stabilization tool can you test to elevate your vlogs?
Remember, the more you practice and experiment, the more you’ll discover what works best for you. Happy vlogging!
Frequently Asked Questions
What Is The Best Focal Range For Vlogging?
The best focal range for vlogging is 16-35mm. This range offers versatility for both wide-angle shots and close-ups.
What Camera Do Most Vloggers Use?
Most vloggers use the Canon G7X Mark III or the Sony ZV-1 for their high-quality video and compact size.
How Do Vloggers Hold Their Camera?
Vloggers often use handheld tripods or stabilizers to hold their cameras. Some prefer using a camera with a flip screen for easy framing.
What Are The 9 Camera Angles?
The 9 camera angles are: 1. Eye-level 2. High angle 3. Low angle 4. Bird’s eye view 5. Worm’s eye view 6. Dutch angle 7. Over-the-shoulder 8. Point-of-view 9. Close-up These angles create various perspectives and emotional effects in photography and cinematography.
Conclusion
Solo vlogging can be challenging, but proper techniques make it easier. Flip-screens and stabilization are essential tools. They help you create engaging content on the go. Always check your framing to ensure your shots look great. With practice, your vlogs will improve.
Keep exploring different angles and methods. This way, you can find what works best for you. Happy vlogging!