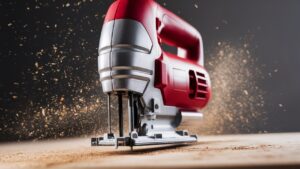
Maintaining your die grinder is crucial for its long-lasting performance. Proper care ensures it works efficiently and safely.
Recommended Best Die Grinder 2025
| Recommendation | Product |
| Best Overall | DEWALT 1-1/2-Inch Corded Die Grinder |
| Popular Choice | Ingersoll 3101G Portable 1/4-Inch Right-Angle Die Grinder |
| Best Value | Milwaukee 12V Cordless 1/4 in. Right Angle Die Grinder |
| Best Budget | WORKPRO Air Angle Die Grinder |
| Another Excellent Pick | AOBEN 1/4″ Electric Die Grinder |
Die grinders are versatile tools used in various tasks, from polishing to cutting. Regular maintenance can extend their lifespan and maintain their efficiency. Neglecting maintenance can lead to malfunctions and safety hazards. This guide will help you understand the basics of die grinder upkeep.
You’ll learn simple steps to keep your tool in top condition. With proper care, your die grinder will serve you well for many years. Let’s explore the best practices for maintaining your die grinder.
Introduction To Die Grinders
Die grinders are versatile tools used in various industries. They offer precision and power for tasks like grinding, polishing, and sanding. Proper maintenance is key for ensuring your die grinder’s long-lasting performance. This guide will walk you through the essentials of maintaining your die grinder.
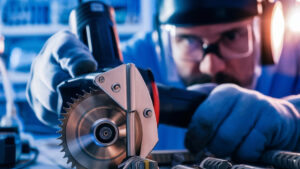
What Is A Die Grinder?
A die grinder is a handheld power tool. It uses various attachments for grinding, sanding, and polishing. Die grinders are used in metalworking, woodworking, and other industries. They are known for their precision and control. Die grinders come in different types: electric, pneumatic, and battery-powered.
Importance Of Maintenance
Regular maintenance ensures your die grinder works efficiently. It helps prevent breakdowns and extends the tool’s lifespan. Clean your grinder after each use. Remove dust and debris to keep it running smoothly. Lubricate moving parts to reduce friction and wear.
Check the attachments and replace worn-out parts. Inspect the power cord and connections for damage. Proper storage prevents moisture and dust buildup. Following these steps will keep your die grinder in top condition. A well-maintained die grinder delivers consistent performance and saves you money on repairs.
Safety Precautions
Regular cleaning and lubrication ensure your die grinder runs smoothly. Check parts for wear and replace as needed. Always follow manufacturer guidelines for maintenance.
Maintaining your die grinder for long-lasting performance involves more than just keeping it clean and lubricated. One of the most crucial aspects of maintenance is ensuring you adhere to safety precautions. Not only does this protect you from potential harm, but it also ensures the tool works efficiently. Let’s dive into some essential safety measures to help you maintain your die grinder safely.
Personal Protective Equipment
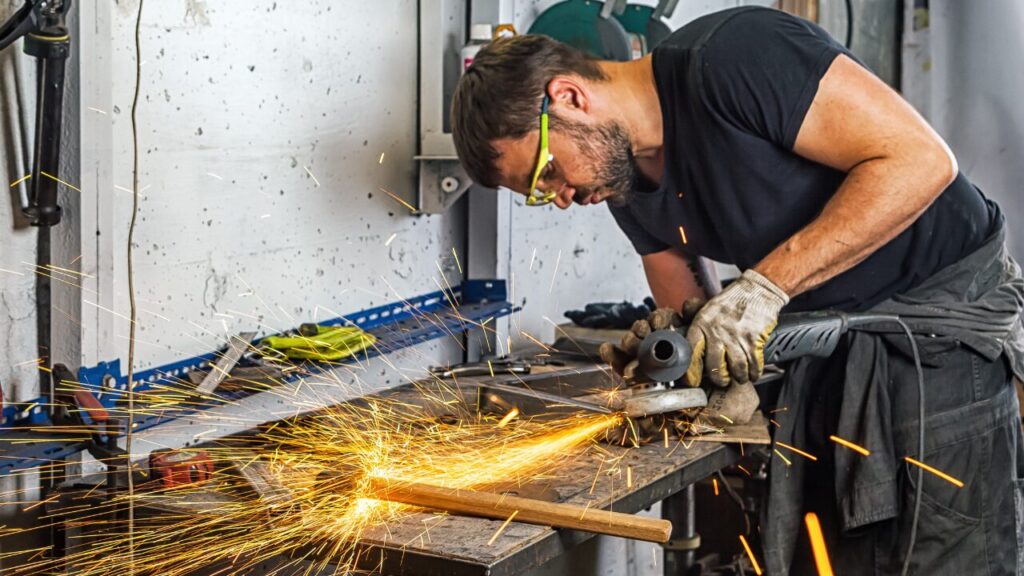
Wearing the right personal protective equipment (PPE) is non-negotiable when using a die grinder. Always wear safety goggles to protect your eyes from flying debris. A face shield provides an extra layer of protection against larger particles.
Use ear protection to guard your hearing from the loud noises die grinders produce. Over time, exposure to high-decibel sounds can lead to hearing loss. Don’t overlook gloves; they protect your hands from vibration and accidental slips.
A dust mask or respirator is crucial when working with materials that generate fine dust. Inhaling these particles can harm your lungs over time. Make PPE a part of your routine to ensure safety every time you use your die grinder.
Safe Handling Practices
Safe handling of your die grinder starts with proper training. Make sure you understand the tool’s functions and operations before use. This knowledge helps prevent accidents and ensures optimal performance.
Always inspect the grinder before you start. Check for any loose parts or visible damage. A quick inspection can prevent a lot of potential issues.
Never force the grinder into the material. Apply gentle pressure and let the tool do the work. Forcing it can cause the grinder to kick back, which is dangerous.
Ensure you have a firm grip on the tool. A stable hold prevents slips and offers better control. Using both hands is advisable for maximum stability.
Finally, maintain a clean workspace. Clutter can cause trips and falls. Keeping your area tidy ensures you can move around safely and focus on your task.
By consistently following these safety precautions, you not only protect yourself but also extend the life of your die grinder. What steps will you take to improve your safety practices today?
Cleaning And Inspection
Cleaning and inspecting your die grinder ensures it performs well. Regular care prevents issues and extends its life. Let’s dive into the key steps for cleaning and inspecting your die grinder.
Regular Cleaning
Clean your die grinder after each use. Remove dust and debris with a soft brush. Wipe it down with a clean, dry cloth. Pay attention to the vents. Keep them clear to prevent overheating. Use compressed air to blow out hard-to-reach areas. Avoid using water or harsh chemicals. They can damage the tool.
Inspecting For Wear And Damage
Inspect your die grinder regularly. Look for signs of wear or damage. Check the power cord for cracks or frays. Examine the grinder’s body for any cracks. Inspect the collet and bit for wear. Replace worn parts immediately. Listen for unusual noises during operation. They can indicate internal damage.
By cleaning and inspecting your die grinder, you ensure it runs smoothly. This simple maintenance keeps your tool in top shape for years.
Lubrication
Lubrication is crucial for maintaining your die grinder’s performance. Proper lubrication reduces friction and wear on the moving parts. This ensures your tool runs smoothly and lasts longer. Regular lubrication can prevent costly repairs and downtime.
Choosing The Right Lubricant
Picking the correct lubricant is essential. Not all lubricants are suitable for die grinders. Use a lightweight machine oil for best results. Avoid heavy greases as they can clog the tool. Check the manufacturer’s recommendations for specific products.
Lubrication Process
Begin by disconnecting the die grinder from the power source. Safety first. Clean the tool with a dry cloth to remove dust and debris. Apply a few drops of oil into the air inlet. Rotate the grinder to distribute the oil evenly.
Next, focus on the collet and other moving parts. Apply oil sparingly. Wipe off any excess oil to prevent buildup. Reconnect the power and run the tool briefly. This helps ensure even oil distribution. Regular lubrication should be part of your maintenance routine.
Replacing Worn Parts
Replacing worn parts is vital for keeping your die grinder in top shape. Fresh parts prevent damage and ensure smooth operation. Regular checks help spot wear early.
Maintaining your die grinder for long-lasting performance is crucial. One key aspect is replacing worn parts. Over time, parts naturally wear out, affecting the tool’s efficiency and safety. By regularly identifying and replacing these parts, you can keep your die grinder in top shape.
Identifying Worn Parts
To keep your die grinder running smoothly, you need to know which parts wear out. Common parts that may need replacing include the collet, bearings, and motor brushes.
Pay attention to unusual sounds or vibrations. These can signal worn parts. If the grinder feels less powerful, it might be time to check its components.
Regularly inspect your die grinder for visible signs of wear and tear. Cracks, rust, or any damage are clear indicators. Also, consult your grinder’s manual for specific parts that require frequent checking.
Steps To Replace Parts
Replacing parts in your die grinder is simpler than it sounds. Follow these steps to ensure a smooth process.
1. Unplug the Grinder: Safety first. Always unplug the tool before starting any maintenance.
2. Identify the Worn Part: Use your manual to locate and identify the worn part.
3. Remove the Part: Use appropriate tools to carefully remove the worn part. For example, if you’re replacing the collet, you might need a wrench.
4. Install the New Part: Place the new part in the same position. Ensure it fits snugly.
5. Test the Grinder: Plug the grinder back in and test it. Listen for unusual noises and check if it operates smoothly.
Remember to keep spare parts on hand. This can save you time in the future.
Have you ever replaced a part and felt the difference immediately? Maintaining your die grinder not only extends its life but also keeps your projects running without a hitch.
Proper Storage
Proper storage of your die grinder is crucial for its longevity. Keeping it in the right environment helps avoid unnecessary wear and tear. It also ensures the tool remains in good working condition for years.
Ideal Storage Conditions
Store your die grinder in a cool, dry place. Avoid areas with extreme temperatures. Heat can warp parts, while cold can make the materials brittle. Keep it away from direct sunlight. Sunlight can cause some components to deteriorate over time. Always store it in a clean area. Dust and debris can damage the internal components.
Preventing Rust And Corrosion
Rust and corrosion can ruin your die grinder. Keep it dry to prevent rust. Moisture is the main enemy of metal tools. Use a protective cover if you store it in a humid area. The cover will keep moisture away from the tool. Apply a light coat of oil to metal parts. This creates a barrier against moisture. Check the tool regularly for signs of rust. Early detection helps you address the problem before it worsens.
Troubleshooting Common Issues
Maintaining your die grinder can sometimes be tricky, especially when issues arise. Knowing how to troubleshoot common problems can save you time and keep your tool in top condition. Let’s dive into some frequent problems and how to solve them.
Motor Problems
The motor is the heart of your die grinder. If it’s not working properly, the whole tool can fail. One common issue is overheating. To prevent this, make sure your die grinder has proper ventilation and isn’t clogged with dust.
If you notice a burning smell or unusual noises, it’s time to check the motor. Loose or damaged wiring can often be the culprit. Tighten any loose connections and replace damaged wires immediately.
Another issue could be worn-out brushes. These small components wear out over time and need regular replacement. Always keep a spare set of brushes handy to avoid downtime.
Operational Issues
Operational issues can range from the grinder not starting to poor performance. If your die grinder won’t start, check the power source first. Ensure your tool is plugged in properly or the battery is charged.
Poor performance could be due to a dull or damaged bit. Regularly inspect and replace bits to maintain efficiency. Clean the collet and bit regularly to avoid debris buildup.
Sometimes, vibrations can affect your grip and precision. Make sure the bit is seated correctly and all components are tightened. Balancing the bit can also reduce vibrations.
Have you faced any of these issues with your die grinder? How did you resolve them? Share your experiences in the comments below and let’s help each other out!
Regular Maintenance Schedule
Maintaining your die grinder is essential for optimal performance and longevity. Establishing a regular maintenance schedule can prevent unexpected breakdowns and extend the tool’s life. This section will guide you through daily checks and monthly and yearly maintenance tasks to keep your die grinder in top condition.
Daily Checks
Start each day with a quick inspection of your die grinder. Check for any visible damage or wear. Ensure all parts are secure and in place. Clean the tool after every use to remove dust and debris. Lubricate moving parts to ensure smooth operation. These simple steps can prevent bigger issues later.
Monthly And Yearly Maintenance
Monthly maintenance involves a deeper inspection. Check the air filters and replace them if they are dirty. Inspect the power cord for any signs of wear. Tighten any loose screws and bolts. Test the grinder to ensure it is functioning correctly.
Yearly maintenance requires a more thorough examination. Disassemble the tool and inspect all internal components. Replace any worn-out parts. Apply fresh lubrication to all moving parts. Check the bearings and replace them if necessary. Reassemble the tool and test it to ensure everything is working properly.
Frequently Asked Questions
How To Lubricate A Die Grinder?
To lubricate a die grinder, disconnect it from the air supply. Add a few drops of pneumatic tool oil into the air inlet. Run the grinder for a few seconds to distribute the oil. Repeat this process regularly to ensure optimal performance.
How Do You Maintain A Grinder?
Clean the grinder regularly. Sharpen the blades as needed. Check and replace worn parts. Lubricate moving components. Store it in a dry place.
How Do You Maintain A Hand Grinder?
Clean the grinder after each use. Regularly check and replace worn parts. Lubricate moving components periodically. Store in a dry place. Use as per instructions.
How Do You Take Care Of An Angle Grinder?
Clean the angle grinder after each use. Regularly check and replace worn-out parts. Lubricate moving components. Store in a dry place. Follow safety guidelines.
Conclusion
Maintaining your die grinder ensures long-lasting performance. Regular cleaning prevents dust buildup. Lubricate moving parts to reduce wear. Always check for loose components. Replace worn-out parts immediately. Store your tool in a dry place. Follow these simple steps and your die grinder will work efficiently.
Happy grinding!