Yes, MIG welding can be easy for beginners. With the right guidance, many find it straightforward.
Recommended Best MIG Welder For Beginners 2025
| Recommendation | Product |
| Best Overall | Forney 271 Easy Weld 140 MP MIG Welding |
| Popular Choice | Lincoln Electric 90i MIG 120V Welding Machine |
| Best Value | TOOLIOM 135A MIG Welder |
| Best Budget | YESWELDER 135Amp MIG Welder |
| Another Excellent Pick | Hobart 210 MVP MIG Welder |
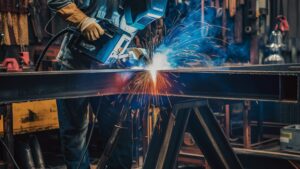
But, it does come with a learning curve. MIG welding, or Metal Inert Gas welding, is a popular method for DIY metalwork. It’s known for being user-friendly and versatile. Many beginners choose MIG welding because it requires less skill compared to other welding techniques.
With some practice and basic understanding, one can achieve strong, clean welds. This blog post will explore the basics of MIG welding, its benefits, and tips for beginners. Whether you’re looking to repair metal items or create new projects, understanding MIG welding can be a valuable skill. Let’s dive in and see why it might be the right choice for your DIY metalwork needs.
Introduction To Mig Welding
MIG welding, also known as Metal Inert Gas welding, is a popular welding process. It uses a wire electrode and a shielding gas to join metals. For beginners, MIG welding is often seen as a good starting point. Let’s dive into its basics and understand why it is important in DIY metalwork.
Basics Of Mig Welding
MIG welding involves feeding a wire electrode through a welding gun. The wire melts and joins the metal pieces together. A shielding gas protects the weld from contaminants. This process is relatively simple to learn.
The equipment needed includes a welding machine, wire electrode, and shielding gas. Safety gear is also essential. This includes gloves, a welding helmet, and protective clothing.
MIG welding works well on various metals. Steel, aluminum, and stainless steel are common examples. It’s suitable for both thin and thick materials. The adjustable settings on the machine help achieve precise results.
Importance In Diy Metalwork
MIG welding is important for DIY metalwork projects. It offers versatility and ease of use. Beginners can quickly grasp the basic techniques. With practice, they can achieve strong and clean welds.
This welding method is ideal for repairing metal objects at home. Garden tools, gates, and furniture can be fixed or created with MIG welding. The process is fast and efficient, making it suitable for various tasks.
Overall, MIG welding provides a practical solution for DIY metalwork. Its simplicity and effectiveness make it accessible to beginners.
Essential Equipment
When it comes to DIY metalwork, having the right equipment is crucial for success and safety. If you’re a beginner looking to start MIG welding, it’s important to invest in the essential gear that will make the process easier and more efficient. Let’s dive into the key pieces of equipment you’ll need to get started.
Welding Machine
The heart of your welding setup is the welding machine. For beginners, a MIG welder is a great choice because it’s relatively easy to use and versatile. Look for a machine that offers adjustable settings to control the voltage and wire speed. This will give you more control over your welds, making it easier to learn and improve your technique.
When I first started with DIY metalwork, I chose a MIG welder with a simple interface. This helped me focus on the welding process without being overwhelmed by complex settings. You might consider brands like Lincoln Electric or Miller, which are known for their reliable and user-friendly machines. Remember, investing in a quality welding machine can make a significant difference in your welding experience.
Protective Gear
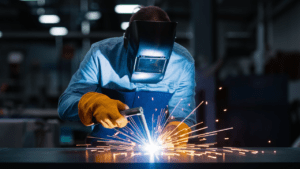
Safety should always be your top priority when welding. Proper protective gear is essential to prevent injuries and ensure a comfortable welding experience. Here’s what you need:
- Welding Helmet: A good welding helmet protects your eyes and face from sparks and harmful UV rays. Look for auto-darkening helmets that adjust the shade based on the brightness of the arc.
- Gloves: Heavy-duty welding gloves protect your hands from heat, sparks, and sharp metal edges. They should be comfortable and flexible enough to allow precise movements.
- Protective Clothing: Wear flame-resistant clothing to shield your skin from hot metal and sparks. A welding jacket made of leather or durable fabric is a good option.
- Boots: Sturdy, closed-toe boots protect your feet from falling objects and hot metal. Steel-toe boots are ideal for added protection.
When I started welding, I underestimated the importance of protective gear. After a few minor burns, I quickly learned that investing in high-quality gear is non-negotiable. Trust me, you’ll appreciate the added safety and comfort.
Are you ready to take the plunge into MIG welding? With the right equipment, you’ll find that the learning curve is manageable and the process can be quite rewarding. What other tools do you think are essential for beginners in DIY metalwork? Share your thoughts in the comments below!
Safety Precautions

When starting with MIG welding, safety precautions are essential. Without proper safety measures, you risk injury. Below are key points to ensure a safe welding experience.
Protective Clothing
Wear appropriate clothing to prevent burns. Use a long-sleeve shirt, preferably flame-resistant. Jeans or thick pants offer good protection for your legs.
Gloves are crucial. Choose heavy-duty welding gloves. They shield your hands from sparks and heat. A welding helmet is non-negotiable. It protects your eyes from harmful rays and flying debris.
Safe Workspace Setup
Create a safe workspace. Ensure proper ventilation. Welding fumes can be harmful. A well-ventilated area reduces the risk of inhaling toxic gases.
Keep a fire extinguisher nearby. Welding can cause sparks. Having a fire extinguisher is a smart safety measure. Ensure your workspace is free from flammable materials. Clear away any clutter that could catch fire.
Use a sturdy welding table. A stable surface helps maintain control. It also prevents accidents. Keep all tools organized. Disorder can lead to mishaps.
Setting Up The Welder
Setting up the welder correctly is crucial for successful MIG welding. Proper setup ensures smooth operation and strong welds. Let’s explore the key steps in setting up your welder.
Choosing The Right Gas
Choosing the right gas is essential. Carbon dioxide (CO2) is common and affordable. It’s good for deep penetration in thicker metals. Argon is another option. It provides a cleaner weld with less spatter. For best results, a mix of 75% Argon and 25% CO2 is recommended. This mix offers a balance of good penetration and clean welds.
Wire Feed And Voltage Settings
Adjusting the wire feed speed is important. Too fast, and the wire stubs into the weld pool. Too slow, and the wire melts back into the tip. Start with the recommended settings from the welder’s manual. Then, make small adjustments as needed. Voltage settings are also key. Higher voltage increases the heat and penetration. Lower voltage is better for thinner materials. Always test on a scrap piece of metal first. This helps you fine-tune the settings for the best weld.
Basic Welding Techniques
Mig welding is quite beginner-friendly for DIY metalwork projects. Its ease of use and straightforward process make it ideal for novices. Many find Mig welding manageable and efficient for basic metalwork tasks.
Learning MIG welding can be a rewarding skill for DIY metalwork. As a beginner, it is important to start with basic welding techniques. These techniques will help you create strong and clean welds. They will also help you handle common issues that arise during welding.
Creating A Clean Weld
A clean weld is essential for the strength and appearance of your project. First, clean the metal surface to remove dirt, rust, and oil. Use a wire brush or grinder. Position your workpiece securely. Ensure it’s stable. This will help you focus on the weld.
Set your MIG welder to the correct settings. Adjust the voltage and wire feed speed based on the thickness of the metal. Hold the welding gun at a 10 to 15-degree angle. This angle allows for better control and visibility. Move the gun steadily along the joint. Keep a consistent speed and distance from the workpiece. This will ensure a uniform weld.
Practice on scrap metal before working on your project. This helps you get comfortable with the process. It also helps you fine-tune your technique.
Handling Common Issues
Beginners often face common issues while welding. One issue is a lack of penetration. This happens when the weld does not fuse properly with the base metal. To fix this, increase the voltage or slow down your travel speed.
Another issue is excessive spatter. Spatter occurs when droplets of molten metal fly off the weld. Reduce spatter by adjusting the wire feed speed. Also, check the cleanliness of the metal surface.
Porosity is another common problem. This is when small holes appear in the weld. It is often caused by contaminants or improper gas flow. Make sure your work area is free of drafts. Keep the gas nozzle clean and maintain a steady gas flow.
By focusing on these basic techniques, beginners can improve their MIG welding skills. Practice and patience are key. Soon, you will create strong and clean welds for your DIY metalwork projects.
“`
Practice Projects For Beginners
Embarking on your journey with MIG welding can be both exciting and daunting. As a beginner, the best way to build confidence and improve your skills is through practice. Tackling small, manageable projects can help you understand the nuances of the technique. Here are a few practice projects designed to get you comfortable with MIG welding while also producing something useful.
Simple Metal Joints
One of the first things you should master as a beginner is creating simple metal joints. Start with butt joints, where two pieces of metal are placed end-to-end. This is the most basic type of joint, but getting it right is crucial for more advanced projects. Practice making clean, strong welds by joining small pieces of scrap metal.
Consider trying lap joints next. Here, one piece of metal overlaps another. This is slightly more challenging but offers good practice in controlling the weld pool and ensuring proper penetration. Keep a close eye on your heat settings and wire feed speed, as these will significantly impact the quality of your weld.
Have you ever wondered how these joints could be used in real-life scenarios? Think about the frames for various DIY projects or even small repairs around the house. Mastering these joints will give you a solid foundation to tackle more complex tasks.
Repairing Household Items
Once you are comfortable with the basics, why not try repairing some household items? This is a great way to apply your new skills to practical problems. Start with something simple, like fixing a broken metal chair leg or a cracked garden tool.
Think about that old metal gate that squeaks every time you open it. With your newfound welding skills, you can reinforce weak spots and extend its life. Or perhaps you have a metal shelf that’s seen better days. A few well-placed welds can make it sturdy again.
Don’t be afraid to tackle these small repairs. They offer a sense of accomplishment and immediate, tangible results. Plus, they can save you money and reduce waste. Have you ever thought about how satisfying it would be to fix something yourself instead of buying new?
Remember, practice makes perfect. The more you weld, the better you’ll get. So, grab your welding gear and start experimenting with these practice projects. You’ll be amazed at how quickly your skills improve.
Expert Tips For Improvement
If you’re a beginner in DIY metalwork, mastering MIG welding can seem like a daunting task. The good news is that with some practical advice and consistent practice, you can significantly improve your welding skills. Below, we share some expert tips that can help you on your journey to becoming proficient in MIG welding.
Consistent Welding Speed
One of the most crucial aspects of MIG welding is maintaining a consistent welding speed. It’s easy to get carried away and either speed up or slow down, which can lead to uneven welds.
To achieve a steady pace, practice on scrap metal first. Observe the molten pool and ensure it’s consistent in size as you move along. If the pool gets too large, you’re moving too slowly; if it’s too small, you’re moving too fast.
Another tip is to establish a rhythm. Count in your head or use a metronome app to help you stay steady. With time, this will become second nature.
Have you ever noticed how experienced welders make it look so easy? That’s because they’ve mastered their speed. By focusing on this element, you’ll see a significant improvement in the quality of your welds.
Maintaining Equipment
Proper maintenance of your welding equipment is essential for achieving the best results. Neglecting your gear can lead to poor performance and even safety hazards.
First, regularly check your nozzle for any spatter buildup. A clogged nozzle can cause erratic arc behavior. Clean it with a wire brush or nozzle cleaner frequently.
Next, inspect your contact tip. Ensure it’s free from wear and tear and replace it if it looks worn out. A damaged tip can result in an unstable arc and inconsistent welds.
Don’t forget the importance of gas flow. Check your gas connections and ensure there are no leaks. A steady flow of gas is crucial for shielding your weld from contaminants.
How often do you think about your welding wire? Store it in a dry place to prevent rust, which can cause feeding issues. A smooth, uninterrupted wire feed is vital for a clean weld.
By keeping your equipment in top shape, you not only extend its lifespan but also improve your welding results. It’s a win-win situation for any DIY metalworker.
Remember, becoming good at MIG welding doesn’t happen overnight. It requires patience, practice, and attention to detail. By focusing on consistent welding speed and maintaining your equipment, you’ll be well on your way to mastering this valuable skill. So, what’s your next welding project going to be?
Common Mistakes To Avoid
Starting with MIG welding can be exciting yet challenging. Beginners often make common mistakes that can affect their metalwork projects. Knowing these mistakes helps improve your welding skills.
Overheating The Metal
One common mistake is overheating the metal. This happens when the welding torch stays too long on one spot. Overheating can warp or burn through the metal. Keep the torch moving to avoid this issue.
Using the correct voltage and amperage settings is crucial. Too high settings can cause overheating. Check the guidelines for the type of metal you are using. Practice maintaining a steady and even pace.
Poor Wire Feed
Poor wire feed is another common problem. It leads to inconsistent welds. First, check the wire tension. If it is too tight or too loose, it can cause problems. Adjust the tension according to the user manual.
Ensure the wire is clean and free of rust. Dirty wire can clog the feed. Use the right size of wire for your project. Too thick or too thin wire can cause feeding issues. Practice makes perfect, so keep trying until you get a smooth feed.
Avoiding these mistakes can make a big difference. Your welds will be cleaner and stronger. Happy welding!
Frequently Asked Questions
Is Mig Welding Easy For Beginners?
Yes, MIG welding is easy for beginners. It offers simple setup, user-friendly controls, and clean welds. With practice, you can quickly learn.
What Is The Easiest Welding For Diy?
MIG welding is the easiest for DIY. It is user-friendly, requires less skill, and offers clean welds. Perfect for beginners.
What Is The Most Common Mistake When Mig Welding?
The most common mistake when MIG welding is improper wire feed speed. This causes inconsistent welds and poor penetration.
Is Mig Easier Than Stick Welding?
Yes, MIG welding is generally easier than stick welding. It offers better control, is more beginner-friendly, and requires less cleanup.
Conclusion
Mig welding can be approachable for beginners with practice and patience. Start with simple projects. Always prioritize safety. Use quality equipment and follow basic guidelines. Over time, skills will improve. Don’t rush the learning process. Enjoy the journey of DIY metalwork.
With dedication, success is achievable.