Applying grout sealers can protect your tile work from stains and damage. It’s an essential step for long-lasting results.
Recommended Best Grout Sealers 2025
| Recommendation | Product |
| Best Overall | Clean-EEZ Grout Sealer |
| Popular Choice | 511 Impregnator Sealer |
| Best Value | AQUA-X 16oz Grout Sealer |
| Best Budget | Meuvcol Grout Sealer |
| Another Excellent Pick | Seal It Green Grout Sealer |
Grout, the filling between tiles, is prone to dirt and moisture. Without a proper sealer, grout can become stained or cracked. This guide will show you how to apply grout sealers effectively. We’ll cover the tools you need, the steps to follow, and some tips for the best results.
Whether you are new to DIY projects or have some experience, this guide will help you keep your tiles looking great for years. Ready to learn more about grout sealers? Let’s dive in.
Choosing The Right Grout Sealer
Choosing the right grout sealer can make a huge difference in how long your grout lasts and how well it holds up to stains and moisture. Whether you’re a seasoned DIY enthusiast or a first-time home renovator, selecting the appropriate sealer is crucial. Let’s dive into the various types and factors to consider when choosing your grout sealer.
Types Of Grout Sealers
Grout sealers come in different types, each with its unique benefits. Here are the most common ones:
- Penetrating Sealers: These sealers absorb into the grout, making them effective against water and stains. They are great for areas exposed to moisture like bathrooms and kitchens.
- Membrane-Forming Sealers: These create a protective layer on top of the grout. They are ideal for dry areas but may not be as effective in wet environments.
- Spray-On Sealers: Convenient and easy to apply, spray-on sealers are perfect for quick jobs. However, they might not offer the same level of protection as penetrating or membrane-forming sealers.
Factors To Consider
When choosing a grout sealer, several factors come into play. Consider the following:
- Location: Think about where the sealer will be used. High-moisture areas like showers need penetrating sealers, while living rooms might be fine with membrane-forming options.
- Ease of Application: If you’re not a pro, you might prefer a sealer that’s easy to apply. Spray-on sealers can be a godsend for first-timers.
- Durability: How long do you want the sealer to last? Penetrating sealers usually offer more durable protection compared to their membrane-forming counterparts.
Remember, the right sealer can save you a lot of trouble down the line. Have you ever chosen a product just because it was on sale, only to regret it later? Choosing the right grout sealer works the same way. Make an informed decision today, and your future self will thank you!
What type of sealer are you leaning towards? Share your thoughts below!
Preparing Your Grout
Before applying grout sealer, proper preparation is essential. Preparing your grout ensures the sealer adheres well and offers lasting protection. Let’s explore the crucial steps involved in getting your grout ready, starting with cleaning techniques and understanding the drying time.
Cleaning Techniques
First, remove any dirt or debris from the grout lines. Use a soft brush and warm water. Scrub gently to avoid damaging the grout. For stubborn stains, mix a solution of vinegar and water. Apply it with a spray bottle. Let it sit for a few minutes, then scrub again. Rinse thoroughly with clean water.
Avoid using harsh chemicals. They can weaken the grout. Instead, stick to mild cleaning solutions. Ensure all cleaning residue is removed. This helps the sealer to adhere properly.
Drying Time
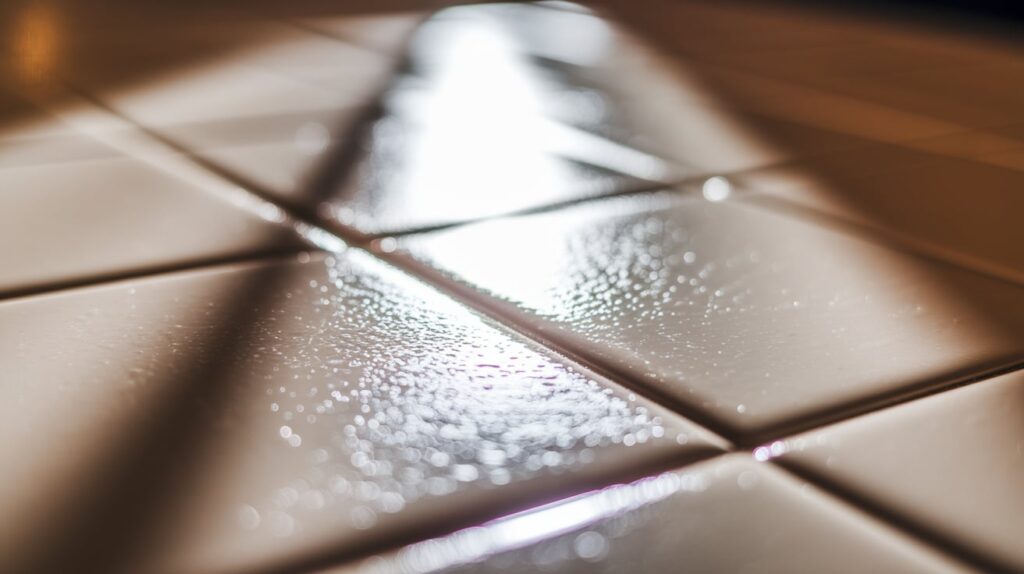
After cleaning, let the grout dry completely. Moisture can prevent the sealer from bonding well. Depending on the humidity and temperature, drying can take 24 to 48 hours. To speed up drying, use fans or dehumidifiers.
Check for any damp spots before applying the sealer. The grout must be fully dry. This step is critical for achieving lasting results.
Application Tools
Applying grout sealers correctly ensures lasting results. Using the right tools is crucial for a smooth application. Different tools offer varied benefits, making some better suited for specific tasks.
Brushes And Rollers
Brushes are great for precision work. They allow you to apply the sealer evenly on the grout lines. Brushes are perfect for small areas and detailed work.
Rollers cover larger areas quickly. They are ideal for floors and expansive surfaces. Rollers ensure an even coat with minimal effort.
Spray Applicators
Spray applicators offer ease of use. They are excellent for fast applications. Sprays distribute the sealer evenly across the grout lines.
Spray applicators are useful for vertical surfaces and hard-to-reach areas. They save time and reduce the mess associated with manual application.
Applying The Sealer
Applying the sealer properly ensures grout stays clean and durable. Use a brush or roller for even coverage. Allow it to dry completely before using the area.
Applying a grout sealer can seem daunting, but it’s a vital step to ensure your tiles stay clean and beautiful. Proper application not only protects your grout from stains and moisture but also prolongs its life. Let’s dive into the nitty-gritty of how you can do this effectively.
Step-by-step Process
Start with cleaning the grout lines thoroughly. Remove all dirt, grease, and old sealant. Use a brush and a good cleaner, then allow it to dry completely.
Once the grout is dry, shake the sealer bottle well. Apply the sealer evenly along the grout lines. You can use a small brush, a roller, or a spray bottle. Each method has its merits. I personally find using a small brush offers more control.
Let the sealer sit on the grout for about 10-15 minutes. During this time, it penetrates the grout lines. Wipe off any excess sealer from the tile surface with a clean cloth before it dries.
Allow the first coat to dry for at least 24 hours. Depending on the product instructions, you may need to apply a second coat. Repeat the application process if necessary.
Common Mistakes
One common mistake is not cleaning the grout thoroughly before applying the sealer. Any dirt or old sealant left behind can prevent the new sealer from adhering properly.
Applying too much sealer can also be problematic. It might create a hazy residue on your tiles. Always remove the excess before it dries.
Rushing the drying process is another pitfall. Give the sealer enough time to dry completely. This ensures the grout absorbs the sealer fully and provides lasting protection.
Have you ever skipped reading the product instructions? This can lead to improper application. Always follow the guidelines provided by the manufacturer for the best results.
By paying attention to these details, you can avoid common pitfalls and achieve a professional finish. What other methods have you tried that worked well for you?
Drying And Curing
Drying and curing are crucial steps in applying grout sealers. Proper drying and curing ensure the sealer works effectively. This process can be influenced by several factors, including temperature and humidity. Understanding the optimal conditions and timeframes can help you achieve the best results.
Optimal Conditions
For the best results, apply grout sealer in a well-ventilated area. Ensure the room temperature is between 50°F and 80°F. Higher or lower temperatures can affect drying. Avoid applying the sealer in high humidity. Moisture can slow the drying process. Use a dehumidifier if needed. Ensure the grout is clean and dry before applying the sealer. This helps the sealer adhere properly.
Timeframes
Drying times can vary based on conditions. Typically, grout sealer dries within 24 to 48 hours. During this period, avoid walking on the sealed area. Allow the sealer to cure fully for 72 hours. This ensures maximum effectiveness. Read the manufacturer’s instructions. They may have specific recommendations for drying and curing times.
Maintaining Sealed Grout
Proper maintenance ensures sealed grout lasts longer and keeps its protective qualities. It involves regular cleaning and periodic reapplication of sealer. Taking these steps can prevent damage and keep grout looking new.
Cleaning Tips
Regularly clean sealed grout with a pH-neutral cleaner. Avoid harsh chemicals that can break down the sealer. Use a soft brush to scrub gently. This prevents scratching the grout. Rinse thoroughly with clean water.
Dry the area completely after cleaning. Moisture can weaken the sealer. Wipe up spills immediately to prevent stains. Keep the grout dry to maintain its protective layer.
Reapplication Guidelines
Reapply grout sealer every 1-2 years. This depends on the amount of traffic and use. High-traffic areas need more frequent reapplication.
Clean the grout thoroughly before reapplying. This ensures the new sealer bonds properly. Follow the manufacturer’s instructions for best results.
Test a small area first. This helps check for compatibility. Apply the sealer evenly and allow it to dry completely.
Troubleshooting Issues
Using grout sealers can prevent stains and damage. Apply evenly and let it dry completely. Ensure clean surfaces for best results.
Applying grout sealers can sometimes lead to unexpected problems. Knowing how to troubleshoot these issues can save you time and effort. This section will help you identify and fix common problems like stains, discoloration, peeling, and flaking.
Stains And Discoloration
Stains and discoloration can appear after applying grout sealers. These issues are often due to improper cleaning before sealing. Ensure the grout is thoroughly cleaned and dried. Residual dirt or moisture can cause stains. If discoloration occurs, you might need to re-clean and reapply the sealer.
Using the wrong type of sealer can also cause discoloration. Always choose a sealer suitable for your grout type. Test the sealer on a small area first to check for any adverse reactions. This step can prevent large-scale staining or discoloration.
Peeling And Flaking
Peeling and flaking are signs of improper sealer application. Applying too thick a layer can cause the sealer to peel. Apply thin, even coats for the best results. Multiple thin layers are better than one thick layer.
Make sure the grout is completely dry before sealing. Moisture trapped under the sealer can lead to peeling. Check the drying times recommended by the sealer manufacturer. Following these guidelines ensures the sealer adheres properly.
Using an incompatible sealer can also cause peeling. Always match the sealer to your grout type. If peeling persists, you may need to remove the old sealer and start fresh. Proper preparation and application techniques are key to avoiding peeling and flaking.
“`
Expert Tips For Best Results
Ensure grout sealers are applied correctly for durable results. Clean surfaces thoroughly and follow product instructions. Proper application extends longevity and enhances appearance.
Applying grout sealers can be a game-changer for maintaining the durability and appearance of your tiles. To achieve the best results, it’s essential to follow expert tips and professional advice.
Professional Advice
Professional advice can make a significant difference in your grout sealing project. Use a quality sealer that is recommended for your specific type of tile. This ensures better protection and longevity.
Always test the sealer on a small, inconspicuous area first. This helps you see how it reacts with your tile and grout.
Apply the sealer evenly using a brush, roller, or spray. This ensures that every part of the grout is covered effectively.
Do’s And Don’ts
Here are some do’s and don’ts to guide you through the process:
Do’s:
– Read the Instructions: Always read the manufacturer’s instructions on the sealer product. Follow them carefully to avoid mishaps.
– Clean Thoroughly: Ensure the grout is clean and dry before you start sealing. Any dirt or moisture can affect the sealant’s effectiveness.
– Apply Evenly: Use a consistent motion to apply the sealer evenly across the grout lines. This helps in avoiding uneven spots.
Don’ts:
– Don’t Rush: Take your time. Rushing can lead to missed spots and uneven application.
– Avoid Over-Application: Applying too much sealer can cause it to pool and not dry properly. It can also make the grout appear darker.
– Don’t Skip Testing: Never skip the test patch. Skipping this step can lead to unintended discoloration or damage.
Have you ever wondered why some grout sealers last longer than others? The key often lies in the application process. Taking the time to apply the sealer correctly can save you from frequent reapplications and potential tile damage.
By adhering to these expert tips, you’ll not only enhance the look of your tiles but also extend their life. So, what are you waiting for? Get started on your grout sealing project today and enjoy the lasting benefits!
Frequently Asked Questions
What Is The Best Way To Apply Grout Sealer?
Apply grout sealer using a brush or applicator bottle. Ensure grout lines are clean and dry. Apply evenly and let it soak. Wipe off excess sealer from tiles. Let it cure as per the manufacturer’s instructions.
How Many Coats Of Grout Sealer Should I Apply?
Apply 2 coats of grout sealer for optimal protection. Ensure each coat dries completely before applying the next.
How Long Do You Leave Grout Sealer On Before Wiping Off?
Leave grout sealer on for 5-10 minutes before wiping off. Follow the manufacturer’s instructions for best results.
Can You Use Too Much Grout Sealer?
Yes, you can use too much grout sealer. Excess sealer can cause a hazy residue and uneven finish.
Conclusion
Sealing grout ensures long-lasting, beautiful results. The process is simple but essential. Proper application protects your tiles from stains and damage. Remember to choose the right sealer for your needs. Clean the grout before sealing for best results. Reapply sealer regularly to maintain protection.
Following these steps will keep your tiles looking new. Your floors and walls will thank you. Happy sealing!