When you purchase through links on our site, we may earn an affiliate commission. Learn more..
Ultimate Guide to Buy a Top Quality Shower Panel System: Expert Recommendations!
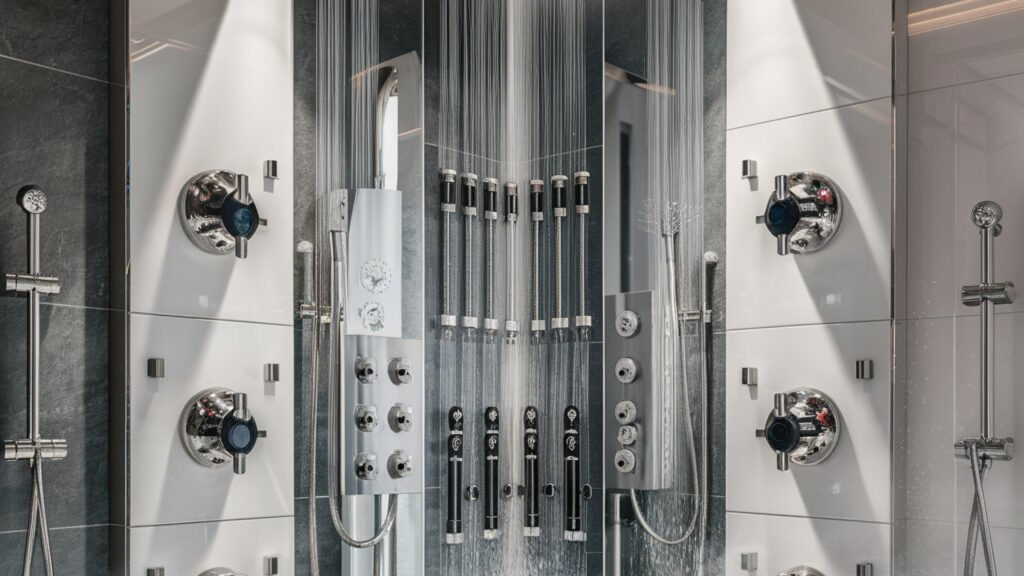
Are you tired of your old, outdated shower and looking to upgrade to a more luxurious and convenient option? Look no further than a shower panel system. Shower panel systems are becoming increasingly popular for their sleek design, multiple functionality, and easy installation.
In this guide, we will provide you with all the information you need to buy a top-quality shower panel system that fits your needs and budget.
What to Look For When Buying a Shower Panel System
When purchasing a shower panel system, there are several important factors to consider:
Design: Look for a shower panel system that complements the style of your bathroom. Choose a finish (such as stainless steel, brushed nickel, or black bronze) that matches your existing fixtures and décor.
Functionality: Determine what features are important to you. Common features include a rain showerhead, handheld shower wand, body jets, and a thermostatic mixer faucet. Choose a system that offers the functions you desire.
Quality: It is crucial to invest in a shower panel system made with high-quality materials. Stainless steel is a popular choice due to its durability and resistance to corrosion. Check customer reviews and ratings to ensure the system is reliable and long-lasting.
Installation: Consider the ease of installation. Most shower panel systems are designed for easy retrofitting, meaning they can be installed without extensive plumbing modifications. However, it is still advisable to hire a professional plumber for installation to ensure proper functioning.
Price: Set a budget for your shower panel system and look for options within your price range. Compare prices from different retailers to find the best deals and discounts available.
Shower Panel System
Technical Reviews and Video Guides
To assist you further in your decision-making process, we have curated a list of technical reviews and video guides that provide detailed information about various shower panel systems:
TECH REVIEW: Check out the 6:37-minute YouTube video that offers an in-depth review of different shower panel systems.
Pro Selection: Explore the 3:31-minute YouTube video that showcases the best shower panel systems available in the market.
Best Product Picker: Watch the 10:05-minute YouTube video that provides a comprehensive review of eight leading shower panel tower systems.
How to Install Glacier Bay Shower Wall System: Quick Guide
To install the Glacier Bay Shower Wall System, apply adhesive to the wall and spread it evenly before pressing the panel firmly onto the surface. Are you ready to transform your bathroom with the sleek and modern Glacier Bay Shower Wall System?
Installing this innovative system is a great way to upgrade your shower area quickly and efficiently. By following a few simple steps, you can achieve a professional-looking installation that will enhance the aesthetic appeal of your bathroom while providing long-lasting durability.
In this guide, we will walk you through the process of installing the Glacier Bay Shower Wall System, ensuring that you have all the information you need to complete the project successfully. Let’s dive in and explore how you can bring a touch of elegance to your daily shower routine with the Glacier Bay Shower Wall System installation.
Introduction To Glacier Bay Shower Wall Systems
Glacier Bay Shower Wall Systems offer numerous benefits, including easy maintenance, durability, and a sleek, modern appearance. The installation process requires basic tools such as a level, drill, and adhesive, as well as the shower wall kit. Additionally, you’ll need to ensure the walls are clean and dry before applying the adhesive. It’s important to follow the manufacturer’s instructions carefully to achieve a professional-looking result. When installing the system, consider the layout of the panels and use a level to ensure they are straight. Once the adhesive is applied, firmly press the panels onto the wall. Finally, seal the seams with silicone to prevent water leakage. With the right tools and attention to detail, installing a Glacier Bay Shower Wall System can be a straightforward and rewarding DIY project.
Preparation Steps
Measuring Your Space Accurately: Before starting the installation process, it is important to take accurate measurements of your shower space. This will help you choose the right size of the shower wall system and avoid any unnecessary cuts or adjustments.
Removing Old Fixtures and Materials: Make sure to remove any old fixtures and materials from your shower space before installing the new wall system. This includes old tiles, showerheads, and faucets. This will help ensure that the new wall system fits properly and looks seamless.
To install a Glacier Bay Shower Wall System, it is important to prepare your shower space properly. This includes measuring your space accurately and removing any old fixtures and materials. By taking accurate measurements, you can ensure that the new wall system fits perfectly and avoid any unnecessary cuts or adjustments. Additionally, removing old fixtures and materials will help ensure that the new wall system looks seamless and fits properly.
Setting Up The Foundation
Begin your bathroom transformation by setting up a solid foundation with the Glacier Bay Shower Wall System installation. Follow step-by-step instructions to attach shower panels securely for a durable and waterproof finish. Get ready to enjoy a stylish and functional shower space in no time.
Installing Moisture-Resistant Backing
Leveling and Securing the Shower Tray
Install cement board or an equivalent moisture-resistant backing behind shower panels.
Fit the shower tray before wall panels for a secure foundation.
Use Adiseal, the strongest adhesive, for shower panels to ensure a flexible, waterproof bond.
Apply shower surround adhesive on the wall before pressing the back panel firmly.
Cutting And Sizing Panels
Tips for Cutting Panels to Size: Before cutting the Glacier Bay shower wall panels, carefully measure and mark the panels for cutting. Use a straight edge and a pencil to mark the lines, ensuring accuracy. When cutting, use a fine-tooth saw or a utility knife for a clean and precise cut. Take your time and follow the marked lines to avoid any errors. It’s essential to measure twice and cut once to ensure the panels fit perfectly into your shower space.
Adhesive Application Techniques
To ensure a secure bond when installing the Glacier Bay Shower Wall System, it’s crucial to choose the right adhesive. Look for a strong, waterproof adhesive that provides a durable bond on shower panels. Adiseal has been identified as the strongest adhesive in independent tests, making it an ideal choice for this application.
When applying the adhesive, use a trowel to spread it evenly over the entire surface where the panel will be placed. Press the panel firmly against the wall to ensure proper adhesion. This will help create a secure and long-lasting bond, providing a reliable foundation for your shower wall system.
Installing The Shower Wall Panels
To install the Glacier Bay Shower Wall System, start by applying the shower surround adhesive to the wall and spreading it evenly. Then, press the back panel firmly onto the wall. It’s recommended to fit the shower tray before the wall panels to ensure a secure foundation.
Use Adiseal, a strong and waterproof adhesive, for best results.
When installing Glacier Bay Shower Wall System, apply adhesive on the wall surface.
Spread the adhesive evenly where the panel will be placed, ensuring proper coverage.
Press the back panel firmly against the wall to ensure a secure bond.
For a secure foundation, consider fitting the shower tray before attaching the wall panels.
Use a strong adhesive like Adiseal, known for its durability and waterproof properties.
Sealing And Caulking
To install the Glacier Bay Shower Wall System, first, ensure a moisture-resistant backing like cement board is in place. Apply shower surround adhesive to the wall, spreading it evenly before firmly pressing the back panel on. Consider fitting the shower tray before wall panels for a secure foundation.
To ensure a watertight seal, it is important to apply caulk to all joints and corners of the Glacier Bay shower wall system. First, clean the area with rubbing alcohol and let it dry completely. Then, cut the tip of the caulk tube at a 45-degree angle and apply a steady, continuous bead of caulk along the joint or corner. Use a caulk smoothing tool or your finger to smooth the caulk and remove any excess. Repeat this process for all joints and corners. Allow the caulk to dry for at least 24 hours before using the shower. This will ensure that the caulk has fully cured and will provide a tight seal to prevent any water from seeping through.
Finishing Touches And Maintenance
Installing Fixtures and Accessories: Once the shower wall system is in place, carefully install the fixtures and accessories. Ensure that all components are securely attached and sealed to prevent leaks.
Cleaning and Caring for Your New Shower Walls: To maintain your new shower walls, regularly clean them with a mild, non-abrasive cleaner. Avoid harsh chemicals that can damage the surface. Additionally, inspect the walls for any signs of wear or damage, and address them promptly to prolong the lifespan of your shower system.
Frequently Asked Questions Of Ultimate Guide To Buy A Top Quality Shower Panel System: Expert Recommendations!
What To Look For When Buying A Shower Panel?
When buying a shower panel, look for high-quality materials, multifunctional features, easy installation, adjustable water settings, and a reputable brand.
Is A Shower System Better Than A Shower Panel?
A shower system and a shower panel each have their pros and cons. The better option depends on your needs.
Are Panel Showers Any Good?
Panel showers offer modern design, multiple features, easy installation, and customizable options for a personalized shower experience.
How Long Do Shower Panels Last?
Shower panels typically last 10 to 15 years, depending on usage and maintenance.
Conclusion
When buying a top-quality shower panel system, consider factors such as design, functionality, quality, installation, and price. Evaluate different options available in the market and choose a system that suits your preferences and budget. With the right shower panel system, you can transform your showering experience into a luxurious and rejuvenating one.
🌿 Passionate Gardener & Retail Professional | Cultivating Growth at IKEA 🌻
Combining a love for greenery with a career in retail, I'm dedicated to creating beautiful spaces both indoors and out. 🏡 As a proud member of the IKEA team, I'm committed to bringing sustainable solutions and inspired design to homes across the USA.