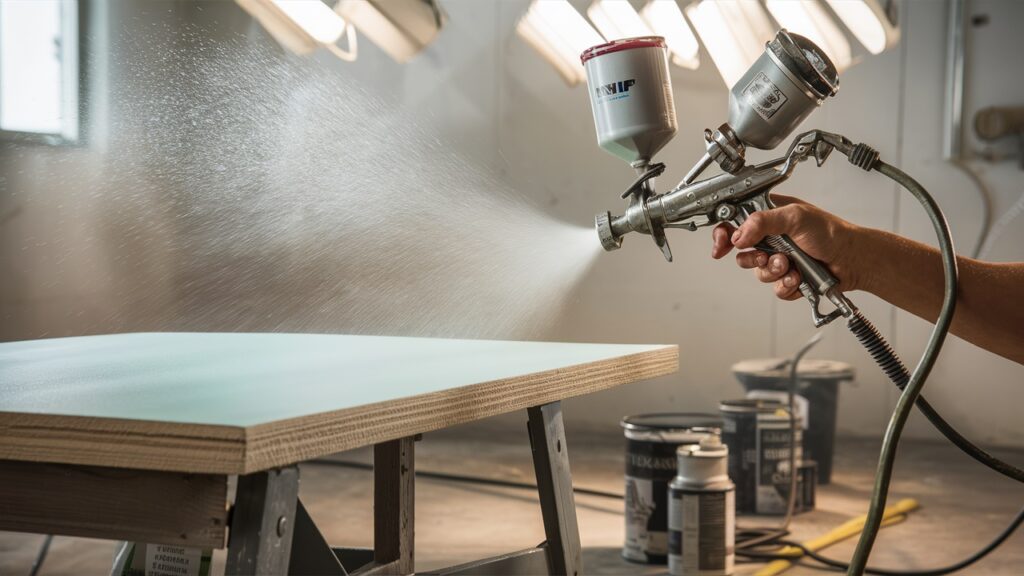
To clean an HVLP spray gun, disassemble it and soak the parts in a suitable cleaning solution. Use a brush to remove residue.
Maintaining your HVLP spray gun ensures optimal performance and longevity. Regular cleaning prevents clogs and ensures even paint application. This process might seem tedious, but it is essential for achieving professional-quality results. Investing a few minutes in thorough cleaning can save you time and money in the long run.
Always follow the manufacturer’s guidelines for cleaning solutions and procedures to avoid damaging the equipment. A well-maintained spray gun delivers a smoother finish and reduces the risk of paint defects. Keep your tools in top condition to achieve the best results on every project.
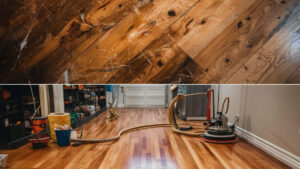
Introduction To Hvlp Spray Guns
Proper maintenance is crucial for HVLP spray guns. Cleaning ensures optimal performance and extends the tool’s lifespan. Disassemble the gun, soak parts in solvent, and scrub thoroughly to remove residue.
What Is Hvlp?
HVLP stands for High Volume Low Pressure. These spray guns use a high volume of air. They operate at low pressure. This makes them more efficient than traditional spray guns. HVLP spray guns produce less overspray. They are also better for the environment.
Benefits Of Using Hvlp Spray Guns
HVLP spray guns save paint. They provide a smoother finish. They reduce the amount of wasted paint. This is good for your budget. HVLP guns are also safer to use. They produce less toxic fumes. This is better for your health.
Necessary Tools And Materials
Gather essential tools and materials for cleaning your HVLP spray gun. Key items include cleaning brushes, solvent, and a soft cloth. Proper maintenance ensures optimal performance and longevity.
Essential Cleaning Tools
Use a soft brush and a cleaning needle. Also, have a container for cleaning solution. A wrench and some clean cloths are needed too. Ensure to have protective gloves for safety. These tools help in removing paint residues and keeping the spray gun parts clean.
Recommended Cleaning Solutions
Warm water is a good start. Use a solvent-based cleaner for tougher stains. Some prefer using mineral spirits. Always ensure the cleaner is safe for your spray gun. Check the manual for the best cleaning solution. Proper cleaning solutions extend the life of your spray gun.
Preparation Before Cleaning
Gather all necessary tools, including cleaning brushes and solvent, to ensure a thorough clean of your HVLP spray gun. Disassemble the spray gun carefully to access all parts for effective cleaning.
Safety Precautions
Always wear protective gloves and safety goggles. Ensure the workspace is well-ventilated. Keep flammable materials away from the area. Use a respirator mask if necessary. Turn off and unplug the spray gun before starting. Ensure there is no pressure in the spray gun.
Disassembling The Spray Gun
Remove the air cap first. Next, take off the fluid nozzle. Unscrew the needle and spring assembly. Carefully detach the paint cup. Keep all parts in a safe place. Inspect each part for damage or wear.
Cleaning The Nozzle And Needle
Properly cleaning the nozzle and needle of an HVLP spray gun ensures smooth operation and prevents clogging. Use a soft brush and solvent to remove paint residue effectively.
Removing Paint Residue
First, remove the nozzle and needle. Use a soft brush to clean them. Ensure there is no paint residue left. Rinse both parts with warm water. Dry them with a clean cloth. Do not use harsh chemicals.
Inspecting For Damage
Check the nozzle and needle for any damage. Look for bends, cracks, or wear. Replace any damaged parts. A clean and undamaged nozzle and needle ensure smooth spray.
Cleaning The Air Cap And Fluid Tip
Remove the air cap and fluid tip. Place them in a container with solvent. Let them soak for 30 minutes. Use a small brush to scrub off paint residue. Ensure all holes are clear. Rinse with clean solvent. Pat dry with a paper towel.
Make sure all parts are dry. Reattach the fluid tip to the spray gun. Secure the air cap. Test the spray gun with water. Check for any blockages. If everything works, your spray gun is clean. Enjoy smooth spraying again.
Cleaning The Paint Cup And Filters
First, remove the paint cup. Dump out any leftover paint. Rinse the cup with water or a cleaning solution. Use a brush to scrub the inside. Make sure to clean all the nooks and crannies. Check the filters for any clogs. Rinse the filters under running water. Shake them to remove excess water.
Thorough Cleaning Techniques
Disassemble the spray gun. Soak the parts in a cleaning solution. Use a brush to scrub the parts. Pay attention to small holes and passages. Use a toothpick to clear any blockages. Rinse all parts with clean water. Make sure no residue is left behind. Let the parts dry completely.
Drying And Reassembly
Place the cleaned parts on a towel. Make sure they are fully dry before reassembly. Reassemble the spray gun carefully. Follow the manufacturer’s instructions. Check that all parts fit correctly. Test the spray gun with water first. Ensure it works before using paint again.
Lubricating And Reassembling
Lubricating and reassembling are essential steps in cleaning an HVLP spray gun. Lubricate moving parts to ensure smooth operation and prevent wear. Reassemble carefully to maintain optimal performance.
Applying Lubricant
Use a small amount of spray gun lubricant. Apply it to the moving parts of the spray gun. Focus on the trigger and needle areas. Make sure to cover all metal-to-metal contact points. Wipe off any excess lubricant with a clean cloth. This helps to keep the spray gun parts moving smoothly.
Proper Reassembly Steps
Follow these steps for proper reassembly:
- Place the needle back into the spray gun body.
- Insert the spring and secure it with the adjustment knob.
- Attach the nozzle to the spray gun.
- Reattach the air cap and tighten it.
- Ensure all parts are securely fastened.
Each part must be in its correct position for the spray gun to work properly.
Maintenance Tips For Longevity
Clean your HVLP spray gun after each use. This prevents paint build-up and clogging. Use a solvent to flush out paint. Disassemble the gun and clean each part. Brush out any residue. Let it dry before reassembling. This keeps the spray gun in top condition.
Store your HVLP spray gun in a dry place. Keep it in a case to protect it from dust. Make sure it is fully dry before storing. Lubricate moving parts to avoid rust. This ensures the gun is ready for the next use. Proper storage extends the life of your spray gun.
Troubleshooting Common Issues
A bad spray pattern can mean different things. The spray might be too thick or too thin. Sometimes, the spray is uneven. Check the nozzle first. Make sure it is clean and not damaged. Look at the air cap too. Dirt or damage can cause problems. If the paint is old, it might not spray well. Thin the paint or use new paint.
Clogging happens when paint dries inside the spray gun. Always clean the gun after use. Remove the nozzle and soak it in solvent. Use a small brush to clean the inside. Make sure all parts are dry before reassembling. Check the filters regularly. Clogged filters can cause problems. Replace them if they are dirty. Use the right paint for your spray gun. Thick paint can clog the gun.
Conclusion And Final Thoughts
Maintaining a clean HVLP spray gun ensures optimal performance and longevity. Regular cleaning prevents clogging and ensures a smooth, professional finish. Proper care enhances efficiency and extends the life of your equipment.
Recap Of Key Steps
Cleaning an HVLP spray gun involves several key steps. First, disassemble the gun carefully. Next, soak the parts in a cleaning solution. Use a brush to scrub away any paint residue. Rinse each part thoroughly with clean water. Dry the parts completely before reassembling the spray gun.
Encouragement For Consistent Maintenance
Regular maintenance keeps your HVLP spray gun in good shape. Consistent cleaning helps the gun perform better. It also ensures a longer lifespan. Clean your spray gun after each use. This habit prevents clogs and buildup. Your projects will look more professional.
Frequently Asked Questions
What Is Best To Clean A Hvlp Spray Gun?
To clean an HVLP spray gun, use a specialized gun cleaning solution. Disassemble the gun, soak parts, and scrub with a brush. Rinse thoroughly and dry completely before reassembling.
How To Clean A Spray Gun After Use?
Disassemble the spray gun. Rinse parts with solvent or water. Scrub with a brush. Dry thoroughly. Reassemble the gun.
Can I Use Paint Thinner To Clean My Paint Sprayer?
Yes, you can use paint thinner to clean your paint sprayer. Ensure compatibility with your sprayer’s materials. Always follow manufacturer guidelines.
How Do You Clean A Graco Hvlp Spray Gun?
To clean a Graco HVLP spray gun, first, disconnect and disassemble it. Rinse parts with water or cleaner. Use a brush to remove residue. Reassemble after drying.
Conclusion
Properly cleaning your HVLP spray gun ensures it lasts longer and performs better. Regular maintenance prevents clogs and ensures a smooth finish. Follow these steps to keep your equipment in top condition. A clean spray gun results in professional-quality work and a more enjoyable painting experience.
Happy spraying!