Turning your mountain bike into an electric bike is simpler than you think. With the right tools and a bit of patience, anyone can do it.
Recommended Best Electric MTB under $2000 in 2025
| Recommendation | Product |
| Best Overall | FREESKY Electric Bike for Adults |
| Popular Choice | BIGUODIR Snow Mountain Ebike |
| Best Value | HAPPYRUN All Terrain Fat Tire Electric Bike |
| Best Budget | Labrador Electric Bike |
| Another Excellent Pick | Exrbyko E Bikes for Adults Electric |
Imagine riding your favorite trails with added power and speed. Converting your mountain bike can give you that thrill. It’s an affordable way to upgrade without buying a new bike. This guide will walk you through the basics. From choosing the right motor to installing the battery, we’ll cover all the essential steps.
By the end, you’ll have a clear understanding of how to transform your ride. So, if you’re ready to bring a new dimension to your biking experience, read on.
Choosing The Right Conversion Kit
So, you’ve decided to transform your trusty mountain bike into an electric bike? That’s an exciting venture! Before you dive in, it’s crucial to choose the right conversion kit. The market is flooded with different options, and making the right choice can feel overwhelming. But don’t worry, we’ll break it down for you. Let’s explore the types of conversion kits available and the factors you should consider to make an informed decision.
Types Of Conversion Kits
First things first, let’s talk about the different types of conversion kits. They generally fall into three categories:
- Front Wheel Kits: These kits replace your front wheel with a wheel that has a motor. They are easy to install but can affect the bike’s balance.
- Rear Wheel Kits: These kits replace your rear wheel. They provide better traction and balance but are slightly more complex to install.
- Mid-Drive Kits: These kits position the motor in the middle of the bike, usually near the pedals. They offer excellent balance and power distribution, but are the most challenging to install.
Factors To Consider
Now that you know the types of kits available, let’s delve into the factors you should consider when choosing the right one for your bike:
- Compatibility: Ensure the kit is compatible with your bike’s frame and wheel size. Not all kits fit all bikes.
- Power: The power of the motor is measured in watts. Consider where and how you’ll be riding. For steep hills, a more powerful motor (500W or more) might be necessary.
- Battery Life: Check the battery capacity, usually measured in amp-hours (Ah). A higher capacity means a longer range.
- Ease of Installation: If you’re not a bike mechanic, you might prefer a kit that’s easier to install, like a front wheel kit.
- Price: Conversion kits can be expensive. Set a budget and find a kit that offers the best features within that range.
Choosing the right conversion kit might seem daunting, but with these tips, you’re well on your way to making the best choice for your mountain bike. Happy riding!
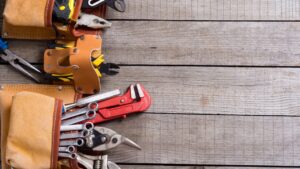
Gathering Necessary Tools And Materials
Gather essential tools and materials for converting your mountain bike into an electric bike. You’ll need a conversion kit, battery, and basic tools like wrenches and screwdrivers. A well-organized workspace is also helpful.
Converting a mountain bike into an electric bike is a rewarding project. It saves money and is fun to do. Before starting, you need to gather the right tools and materials. This step ensures a smooth and successful conversion process.
Essential Tools
To start, you will need a set of basic hand tools. A screwdriver set is a must. You will also need a wrench set. These tools help you remove and install bike parts.
Next, get a pair of pliers. They come in handy for gripping and cutting wires. A wire stripper is also essential for handling electrical connections. Don’t forget a soldering iron. It helps in connecting wires securely.
Finally, have a multimeter. This tool checks the electrical connections. It ensures everything is working correctly.
Additional Materials
Now, let’s talk about the materials. First, you need an electric bike conversion kit. This kit includes a motor, battery, and controller. These parts are the heart of your electric bike.
You will also need zip ties. They help secure cables and wires neatly. Electrical tape is necessary too. It insulates wire connections and prevents short circuits.
Lastly, get some heat shrink tubing. It provides a professional look to your wire connections. It also adds an extra layer of protection.
With these tools and materials, you are ready to convert your mountain bike. Enjoy the process and happy riding!
“`
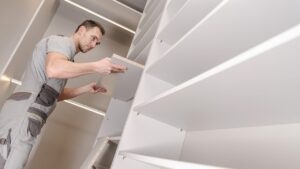
Preparing Your Mountain Bike
Converting your mountain bike into an electric bike is a fun project. It also makes your bike more versatile. But first, you need to prepare your bike. This step ensures your bike is ready for the transformation. It also helps prevent future problems. Let’s dive into the steps involved.
Inspecting The Bike
First, examine your mountain bike. Look for any signs of wear and tear. Check the frame for cracks or dents. Inspect the tires for any punctures or excessive wear. Make sure the brakes work well. A well-maintained bike is crucial for a smooth conversion.
Cleaning And Maintenance
Next, clean your bike thoroughly. Remove any dirt or grime from the frame, gears, and wheels. Use a brush and soapy water for best results. Cleaning helps you spot any hidden issues. It also makes working on the bike easier.
After cleaning, lubricate the chain and other moving parts. This reduces friction and extends the life of your bike. Check the gears and adjust them if needed. Tighten any loose bolts or screws. These steps ensure your bike is in top shape.
By inspecting and cleaning your bike, you set a strong foundation for the conversion. A well-prepared bike makes the process smoother and more enjoyable.
Installing The Motor
So, you’ve decided to convert your mountain bike into an electric bike? Awesome choice! One of the key steps in this transformation is installing the motor. This process can seem a bit daunting at first, but don’t worry. With a little patience and some basic tools, you’ll have your bike zipping along in no time. Let’s dive right into the details of where and how to place the motor on your bike.
Motor Placement Options
First things first, you need to decide where to place the motor. There are a few options to consider:
- Front Hub Motor: This motor is installed in the front wheel hub. It’s easy to install and provides good balance. However, it might make steering a bit tricky at first.
- Rear Hub Motor: This motor goes in the rear wheel hub. It offers better traction and handling. But, it can make the rear of the bike heavier.
- Mid-Drive Motor: This motor is mounted in the center of the bike, near the bottom bracket. It provides a natural riding feel and better weight distribution. However, it’s usually more complex to install.
Mounting The Motor
Once you’ve chosen the motor placement, it’s time to mount it. Here’s a simple guide:
- Remove the Wheel: If you’re using a hub motor, start by removing the wheel where the motor will be placed. This usually involves loosening the nuts or quick release lever.
- Attach the Motor: Place the motor into the wheel hub. Make sure it fits snugly. Align the axle with the dropouts on the frame. Tighten the nuts or quick release lever securely.
- Mid-Drive Motor: If you’re using a mid-drive motor, remove the crankset and bottom bracket. Install the motor in its place, following the manufacturer’s instructions. Secure it with the provided bolts.
- Connect the Wires: Attach the motor wires to the controller. Make sure the connections are secure and properly insulated to avoid short circuits.
- Test the Motor: Spin the wheel or crank the pedals to ensure the motor is installed correctly. Check for any unusual noises or resistance.
And there you have it! Your motor is now installed. It might seem like a lot at first, but take it step by step and you’ll get there. Got any questions or tips? Drop them in the comments below!
Connecting The Battery
Connecting the battery is a crucial step in converting your mountain bike into an electric bike. The battery powers the motor and determines the range and speed of your e-bike. Ensuring proper connection and installation is key to a smooth and safe ride.
Battery Types
There are various battery types available for electric bikes. The most common are Lithium-ion (Li-ion) and Lithium Polymer (LiPo) batteries. Li-ion batteries are popular due to their high energy density and long lifespan. They are also lightweight, making them perfect for mountain bikes.
LiPo batteries are another option. They offer high performance but require careful handling. They are lighter than Li-ion batteries but can be more expensive and less durable. Choose the battery type that suits your needs and budget.
Safe Battery Installation
Safety is paramount when installing the battery on your bike. First, ensure the battery is compatible with your motor and controller. Check the voltage and capacity specifications. Read the manufacturer’s instructions carefully.
Mount the battery securely to the bike frame. Use strong brackets or a dedicated battery mount. Ensure the battery is stable and does not move while riding. Connect the battery cables to the motor controller. Ensure the connections are tight and secure.
Avoid placing the battery near any moving parts or areas prone to impact. Keep the battery away from extreme heat or moisture. Regularly inspect the battery and connections for signs of wear or damage. Proper installation ensures a safe and efficient ride.
Wiring And Controller Setup
Converting your mountain bike into an electric bike involves a few key steps. One of the most important steps is setting up the wiring and controller. This ensures your new electric bike runs smoothly and efficiently. A proper setup will also maximize your bike’s performance and safety.
Running The Wires
Start by identifying all the components that need to be connected. This includes the battery, motor, throttle, and controller. Plan the wire paths to avoid tangling and ensure a clean look. Use zip ties to secure the wires to the bike frame. This keeps them from getting caught or damaged while riding. Make sure all connections are tight and secure. Loose wires can cause malfunctions and reduce efficiency.
Setting Up The Controller
The controller is the brain of your electric bike. It manages the power flow between the battery and motor. Find a safe and accessible place on your bike to mount the controller. This could be under the seat or near the battery. Use screws or mounting brackets for a secure fit. Connect the controller to the battery and motor according to the instructions. Double-check all connections to avoid any issues later.
Finally, test the setup to ensure everything works correctly. Turn on the bike and check for any error codes or warning lights. If everything runs smoothly, you’re ready to hit the road with your new electric mountain bike.
Testing And Troubleshooting
Testing and troubleshooting your converted electric mountain bike is crucial. It ensures safety and optimal performance. Proper testing will help you spot any issues early. Addressing these issues right away can save you time and effort in the long run. Let’s dive into the steps you need to follow.
Initial Test Ride
Start with a short ride in a safe area. Wear your helmet and safety gear. Check the motor’s response to your pedaling. Listen for unusual sounds. Watch for any jerky movements. Ensure the brakes are working properly. Test the throttle, if you have one, for smooth acceleration. Keep an eye on the battery level and power output. Note any issues you encounter.
Common Issues And Fixes
Sometimes, the motor may not run smoothly. Check all connections first. Loose wires can cause problems. Tighten them if needed. If the battery drains quickly, it could be due to improper charging. Ensure you follow the manufacturer’s guidelines. The motor may also overheat. This could be from overuse or insufficient ventilation. Take breaks during long rides to avoid this.
The bike may feel unbalanced. This could be due to the battery placement. Adjusting the battery position can help. If the bike wobbles, check the tires. Ensure they are properly inflated. Uneven tire pressure can cause instability. If the bike makes strange noises, it might be a sign of mechanical issues. Inspect the gears and chain for wear and tear.
Keep a log of all issues and fixes. This will help you track recurring problems. Regular maintenance is key. Check your bike before each ride. This ensures a smooth and safe ride every time.
Safety Tips And Maintenance
Converting your mountain bike into an electric bike can be an exciting and rewarding project. However, it’s essential to prioritize safety and regular maintenance to ensure a smooth ride. In this section, we’ll dive into some crucial safety tips and maintenance practices to keep your e-bike in top-notch condition.
Safety Precautions
Before hitting the trails with your newly converted electric bike, it’s vital to follow some safety precautions. These tips will help you avoid accidents and enjoy your ride to the fullest.
- Wear Protective Gear: Always wear a helmet, gloves, and knee pads. Safety first!
- Check Battery Connections: Ensure that the battery is securely connected and there are no loose wires.
- Test Brakes: Make sure your brakes are working correctly. E-bikes can be faster than traditional bikes, so efficient braking is crucial.
- Be Visible: Use lights and reflective gear, especially if riding at night. Visibility is key to avoiding accidents.
Regular Maintenance
Maintaining your electric bike regularly will extend its lifespan and ensure it runs smoothly. Here are some maintenance tips to keep in mind:
- Battery Care: Charge your battery regularly but avoid overcharging. Store it in a cool, dry place when not in use.
- Tire Pressure: Check tire pressure before every ride. Properly inflated tires provide better performance and safety.
- Chain Lubrication: Keep the chain lubricated to prevent rust and wear. A well-lubricated chain ensures a smoother ride.
- Inspect Wiring: Regularly inspect all electrical connections and wiring for any signs of wear or damage. Replace any damaged parts immediately.
- Brake Pads: Check brake pads for wear and tear. Replace them if they are worn out to ensure effective braking.
Converting your mountain bike into an electric bike can be a thrilling experience. By following these safety tips and maintaining your bike regularly, you can enjoy a safe and enjoyable ride every time. So, gear up, take the necessary precautions, and hit the trails with confidence!

Frequently Asked Questions
Can I Turn My Mountain Bike Into An Electric Bike?
Yes, you can turn your mountain bike into an electric bike. Use a conversion kit with a motor, battery, and controller.
How Much Does It Cost To Convert A Mountain Bike To Electric?
Converting a mountain bike to electric can cost between $300 and $1,500. Prices vary based on components and quality.
How Much Does It Cost To Convert A Bicycle To Electric?
Converting a bicycle to electric costs between $300 and $1,000. Prices vary based on the kit and bike compatibility.
Is It Hard To Convert A Bike To An Ebike?
Converting a bike to an e-bike can be challenging. It requires technical skills, the right tools, and quality components. Many choose professional help.
Conclusion
Converting a mountain bike into an electric bike can be rewarding. It offers more convenience for your rides. You save money by upgrading your current bike. Follow the steps carefully for a smooth transition. Ensure you have the right tools and parts.
Enjoy the benefits of an electric bike. You’ll find riding more enjoyable and efficient. Start your conversion today and experience the difference. Happy riding!