Fixing a broken lawn sprinkler pipe is easier than you think. You can save money and learn a new skill.
Recommended Best Lawn Sprinkler 2025
| Recommendation | Product |
| Best Overall | Eden Lawn & Garden Essential Oscillating Sprinkler |
| Popular Choice | Aqua Joe Indestructible Metal Base Oscillating Sprinkler |
| Best Value | Joeys Rotating Garden Sprinkler |
| Best Budget | Kadaon 360 Degree Rotating Lawn Sprinkler |
| Another Excellent Pick | Melnor MiniMax Turbo Oscillator Sprinkler |
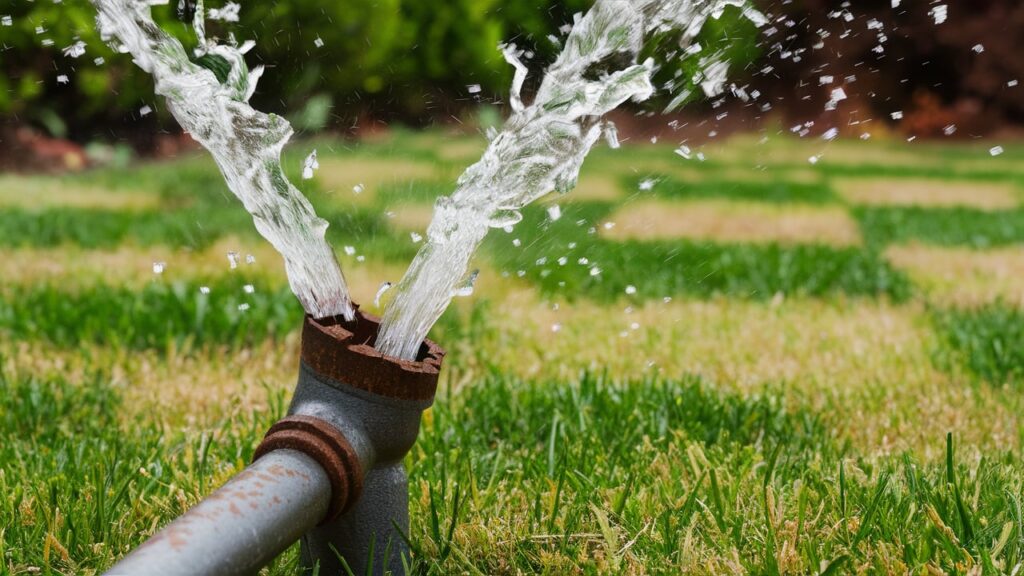
Broken sprinkler pipes can cause water waste and a patchy lawn. Many homeowners feel intimidated by the repair process. But with the right guidance, it’s quite simple. This guide will walk you through the steps, making it easy for beginners.
Whether it’s a small crack or a major break, you’ll be equipped to handle the repair. Soon, your lawn will be lush and your sprinkler system will work efficiently. Let’s dive in and get your sprinkler system back in shape!
Introduction To Sprinkler Systems
Sprinkler systems are vital for keeping your lawn green and healthy. They ensure that water is evenly distributed, saving you time and effort. Understanding how they work is crucial for maintaining them properly.
Importance Of Maintenance
Regular maintenance of your sprinkler system can prevent major issues. It helps in identifying leaks, broken pipes, and clogged nozzles early. This proactive approach saves you from costly repairs in the long run.
Imagine waking up to a flooded lawn because of a broken pipe. Regular checks can help you avoid such scenarios. A well-maintained system also ensures that your lawn gets the right amount of water, promoting healthy growth.
Common Issues
Several common issues can affect your sprinkler system. Broken pipes are a frequent problem that can lead to water wastage. Clogged nozzles can disrupt water flow, causing dry patches on your lawn.
Leaks are another common issue that can escalate quickly if not addressed. They can cause uneven watering and damage to the surrounding areas. Identifying these issues early can make repairs easier and less costly.
Have you ever noticed a sprinkler head that doesn’t pop up? This is often due to debris or mechanical failure. Knowing how to troubleshoot these issues can save you a lot of headaches.
By understanding these common problems, you can take steps to prevent them. Regular inspections and prompt repairs will keep your sprinkler system running smoothly.
Have you checked your sprinkler system lately? What issues did you find, and how did you address them?
Identifying A Broken Pipe
Detecting a broken lawn sprinkler pipe often involves looking for wet spots, low water pressure, or unusual geysers. Promptly identifying these signs can prevent further damage and ensure a well-maintained lawn.
Identifying a broken lawn sprinkler pipe can feel like solving a mystery. Knowing what to look for can save you time and money. Let’s dive into the key aspects of identifying a broken pipe.
Signs Of Damage
First, you need to know the signs of a damaged sprinkler pipe. Look for areas in your lawn that are wetter than usual. Puddles or soggy patches can indicate a leak.
Another sign is a sudden drop in water pressure. If some sprinklers aren’t spraying as far as they used to, a broken pipe might be the culprit.
Listen for unusual sounds. Hissing or gurgling noises can signal that water is escaping from a crack or break.
Tools Needed
Before you start, gather the necessary tools. You will need a shovel to dig and expose the pipe. A pipe cutter or a hacksaw will help you remove the broken section.
Get a repair coupling or a new pipe section. Make sure it matches the size of your existing sprinkler pipe.
You’ll also need PVC primer and cement if you are working with PVC pipes. These will help you bond the new section securely.
Identifying a broken sprinkler pipe doesn’t have to be complicated. By knowing the signs and having the right tools, you can tackle the repair confidently. Have you ever noticed any of these signs in your yard? What tools do you find indispensable for DIY repairs?
Preparing For The Repair
Before diving into the actual repair of a broken lawn sprinkler pipe, proper preparation is essential. This ensures safety and makes the process smoother. By preparing in advance, you can avoid unnecessary delays and potential complications. Let’s break down the steps needed to get ready for the repair.
Shutting Off Water Supply
The first step in preparing for the repair is shutting off the water supply. Locate the main water valve for your sprinkler system. Turn it off completely to prevent water from flowing through the pipes. This step is crucial to avoid flooding your lawn during the repair process.
Gathering Materials
Next, gather all the materials and tools you will need for the repair. Common items include a shovel, pipe cutter, PVC pipe, couplings, and PVC glue. Having everything on hand will save time and make the repair process more efficient. Check to ensure all items are in good condition before starting the repair.
Excavating The Pipe
Excavating the pipe is a crucial step in repairing a broken lawn sprinkler pipe. It might seem daunting at first, but with the right approach, you can get the job done efficiently. Let’s break it down into manageable steps, starting with locating the break and then digging properly.
Locating The Break
Finding the exact spot of the break is essential. Start by turning on the sprinkler system and observing where the water is leaking. This is usually the first clue to find the break.
Check for soggy patches or areas with unusual water flow. These signs often indicate where the pipe might be broken. Mark this area, as it will guide your excavation efforts.
In my experience, the break was right under a particularly muddy spot in the yard. Identifying it early saved me a lot of unnecessary digging. Have you ever faced a similar situation?
Digging Properly
Once you have located the break, it’s time to dig. Use a shovel or spade to carefully remove the top layer of soil. Be gentle to avoid damaging the pipe further.
Dig around the marked area in a square or rectangular shape. This will give you enough room to work. Make sure to keep the soil you remove nearby, so you can fill the hole back in later.
As you get closer to the pipe, switch to a hand trowel or your hands to gently clear the soil away. This helps prevent accidental damage to the pipe. Have you tried using a hand trowel before? It can make a big difference in delicate situations.
Remember, patience is key. Taking your time during this step ensures you won’t create more work for yourself later. Happy digging!
Removing The Damaged Section
Cut out the damaged section of the broken lawn sprinkler pipe using a PVC pipe cutter. Make clean, straight cuts.
Removing the damaged section of a broken lawn sprinkler pipe is a critical step in ensuring your system works efficiently. It’s a task that requires a bit of precision but is entirely manageable for beginners. Let’s break it down into clear, actionable steps.
Cutting The Pipe
First, you need to cut out the broken section. Use a PVC pipe cutter for a clean cut. If you don’t have one, a hacksaw can work, but be careful to cut as straight as possible.
Measure the damaged area and mark it. Ensure you leave enough room on either side to attach a new piece. This is a great time to double-check your measurements. Accuracy here will save you headaches later.
Cleaning The Area
Before installing the new pipe section, clean the surrounding area. Remove any dirt and debris from the exposed ends of the pipe. This ensures a proper seal when you attach the new piece.
Wipe down the pipe ends with a clean cloth. If you see any rough edges, smooth them out with sandpaper. This step may seem small, but it can prevent leaks.
Have you ever noticed how a tiny oversight can lead to significant issues? Paying attention to these details can make your repair last longer.
By following these steps, you’re well on your way to fixing that broken sprinkler pipe. Have you encountered any challenges while working on your lawn? Share your experiences in the comments!
Installing The Replacement Pipe
Repairing a broken lawn sprinkler pipe may seem daunting, but it’s manageable with the right steps. After identifying the broken section and removing the damaged pipe, the next crucial step is installing the replacement pipe. This process is straightforward with proper guidance. Follow these steps to ensure a secure and effective replacement.
Measuring And Cutting
First, measure the length of the broken pipe section. Use a tape measure for accuracy. Ensure the replacement pipe matches this length. Mark the measurement on the new pipe with a marker.
Next, cut the replacement pipe to the marked length. Use a pipe cutter or a hacksaw for a clean cut. Ensure the cut is straight for a proper fit. After cutting, smooth the edges using sandpaper. This prevents any rough edges from damaging the fittings.
Connecting New Pipe
Start by applying primer to the ends of the replacement pipe and the existing pipe. This ensures a strong bond. Follow up by applying PVC cement to the same areas.
Quickly insert the replacement pipe into the fittings. Hold the pipe in place for a few seconds to allow the cement to set. Ensure the connections are secure and aligned properly. This prevents future leaks.
Finally, let the cement dry as per the manufacturer’s instructions. Once dried, turn on the water supply to check for leaks. If there are no leaks, your sprinkler system is ready to use.
Testing The Repair
Check for leaks by turning on the water. Ensure all connections are secure and the pipe is functioning properly.
Testing the Repair
Once you’ve repaired your broken lawn sprinkler pipe, it’s crucial to test your work before covering everything up. This ensures the repair is effective and prevents future issues. Here’s how to test your repair properly.
Turning On Water Supply
Start by slowly turning on the water supply to your sprinkler system. This gradual increase in pressure helps avoid any sudden bursts that might cause new leaks.
Stand by the repaired section as you do this. Watch closely for any immediate signs of water escaping.
Don’t rush this step. Allow the water to flow for a few minutes to ensure the pressure stabilizes.
Checking For Leaks
After the water supply is fully on, inspect the repaired area for leaks. Use your hands to feel around the pipe if necessary. Sometimes, small leaks are hard to see but easy to feel.
Check not just the repaired section but also surrounding connections. A solid repair can sometimes put pressure on nearby weak spots.
If you spot a leak, turn off the water and tighten the fittings. You might need to apply more sealant or even redo the repair.
Remember, a successful repair means no water should be leaking out. If everything looks good, you can proceed to cover up the area and enjoy your well-functioning sprinkler system.
Have you ever faced unexpected issues during such repairs? Share your experiences in the comments below.
Covering The Pipe
Fixing a broken lawn sprinkler pipe can be simple. Start by locating the break and turning off the water. Then, remove the damaged section and replace it with a new pipe piece.
Covering the Pipe
Once you’ve fixed the broken lawn sprinkler pipe, the next crucial step is covering it back up. This might seem straightforward, but doing it properly ensures your repair lasts and your lawn looks great.
Use these practical tips to make the process simple and effective.
Filling The Trench
Start by carefully filling the trench you dug to access the broken pipe. Add the soil gradually to avoid damaging the repaired pipe.
Use a shovel to evenly spread the soil. Make sure there are no air pockets. These can cause the ground to sink later.
Pack the soil down gently but firmly. This helps to stabilize the pipe and prevents future issues.
Restoring The Lawn
Once the trench is filled, it’s time to restore your lawn to its former glory. Replace any grass or sod you removed earlier.
Align it properly to match the surrounding area. Press it down firmly to ensure good contact with the soil.
Water the area generously. This helps the grass to re-establish itself and blend seamlessly with the rest of your lawn.
Have you ever noticed how a quick repair can make such a big difference? Taking these extra steps ensures your hard work pays off and your lawn remains lush and green.
Remember, attention to detail is key. How satisfying will it be to see your lawn looking as good as new, knowing you did it yourself?
Maintaining Your Sprinkler System
Fixing a broken lawn sprinkler pipe might seem challenging. With this beginner’s guide, learn simple steps to make repairs. Ensure your lawn stays green and healthy.
Keeping your sprinkler system in good condition saves you time and money. Proper maintenance ensures your lawn stays green and healthy. Here are some essential tips to help you maintain your sprinkler system.
Regular Inspections
Check your sprinkler system every month. Look for broken or clogged sprinkler heads. Ensure there are no leaks in the pipes. Test the water pressure to make sure it is consistent. A thorough inspection helps spot issues early. This prevents expensive repairs later.
Preventive Tips
Adjust your sprinkler heads to avoid watering sidewalks or driveways. Clean the nozzles to ensure proper water flow. Trim grass and plants around the sprinkler heads. This prevents blockages and ensures even coverage. Use a timer to manage watering schedules efficiently. This helps conserve water and keeps your lawn healthy.
By following these simple steps, you can extend the life of your sprinkler system. Regular maintenance keeps your lawn looking its best.
“`
Conclusion And Final Tips
Repairing a broken lawn sprinkler pipe may seem daunting at first. With the right guidance, even beginners can handle this task. This section provides a recap and some final tips to ensure your repair is successful.
Summarizing Steps
First, locate the broken pipe. Shut off the water supply to avoid flooding. Dig carefully around the pipe to expose the damaged area.
Next, cut out the broken section using a pipe cutter or saw. Prepare a replacement pipe of the same length and material. Use connectors to join the new pipe segment with the existing pipes. Make sure the connections are tight and secure.
Finally, turn on the water supply to test the repair. Check for any leaks. If everything looks good, cover the pipe and restore the area to its original state. Your lawn sprinkler system should now work properly.
Encouraging Diligence
Take your time with each step. Rushing can lead to mistakes. Double-check all connections to avoid leaks. A small oversight can cause big problems later.
Always use the right tools for the job. The right tools make the work easier and more effective. Keep safety in mind. Wear gloves and protective eyewear to prevent injuries.
Follow these steps and tips to successfully repair your lawn sprinkler pipe. Your lawn will stay green and healthy. Happy repairing!
Frequently Asked Questions
How Do You Fix A Broken Sprinkler Pipe?
Turn off the water supply. Dig around the pipe. Cut out the damaged section. Replace with a new pipe piece. Secure connections with couplings and glue. Test the system.
Can A Sprinkler Pipe Be Patched?
Yes, a sprinkler pipe can be patched. Use a repair clamp or a coupling to fix the leak. Ensure the pipe is dry before applying the patch. Regularly inspect for any further issues after repair.
How Do You Cap Off A Broken Sprinkler Pipe?
Turn off the water supply. Cut the broken pipe cleanly. Use a cap or plug fitting. Secure with PVC cement.
What Happens If A Sprinkler Pipe Breaks?
A broken sprinkler pipe can cause water damage and flooding. Shut off the water supply immediately. Call a professional to repair the pipe and assess the damage.
Conclusion
Fixing a broken lawn sprinkler pipe can be simple. Follow the steps above. You will save money and keep your lawn green. Practice makes perfect. Each repair boosts your confidence. Soon, you will handle any sprinkler issue with ease. Remember to check pipes regularly.
Catching small problems early prevents bigger issues. Happy gardening!