Bonding plastic permanently can be tricky. Waterproof adhesives make it easier.
In this step-by-step guide, we will explore the best methods to bond plastic using waterproof adhesives. Whether you are working on a DIY project or a professional task, achieving a strong and lasting bond is crucial. This guide will simplify the process, making it accessible even for beginners.
We’ll cover the types of adhesives, their applications, and the step-by-step instructions needed for success. By the end of this guide, you’ll have the confidence to tackle any plastic bonding project with ease. Let’s dive into the world of waterproof adhesives and discover how to make those bonds last forever.
Choosing The Right Adhesive
Selecting the right adhesive is crucial for permanently bonding plastic. This step-by-step guide helps you use waterproof adhesives effectively. Achieve strong, long-lasting bonds with ease.
Selecting the right adhesive is crucial for bonding plastic permanently. The adhesive you choose will determine the strength and durability of the bond. It is important to understand the types of adhesives available and the factors to consider before making a choice.
Types Of Waterproof Adhesives
There are several types of waterproof adhesives suitable for bonding plastic.
– Epoxy: Provides strong bonds and is water-resistant. Ideal for heavy-duty projects.
– Cyanoacrylate (Super Glue): Quick-setting and strong. Best for small repairs.
– Polyurethane Adhesive: Versatile and waterproof. Works well on various plastics.
– Silicone Sealant: Flexible and waterproof. Suitable for outdoor and marine use.
Factors To Consider
Several factors must be considered when choosing an adhesive.
– Plastic Type: Different plastics require specific adhesives.
– Strength Requirement: Determine the bond strength needed.
– Water Exposure: Consider the level of water exposure the bond will face.
– Curing Time: Some adhesives cure faster than others.
– Flexibility: Some projects need a flexible bond.
– Temperature Resistance: Ensure the adhesive can withstand temperature changes.
Choosing the right adhesive ensures a strong, durable bond for your plastic projects. Always read the product instructions for the best results.
“`
Preparing The Plastic Surface
Properly preparing the plastic surface is crucial for a strong, permanent bond. This ensures the adhesive sticks well and provides a durable, waterproof seal. Follow these steps to get the best results.
Cleaning The Plastic
First, clean the plastic thoroughly. Use a mild detergent mixed with warm water. Scrub the surface with a soft cloth to remove dirt and grease. Rinse the plastic well with clean water. Let it dry completely before moving to the next step.
Sanding For Better Adhesion
Next, sand the plastic surface. Use fine-grit sandpaper, around 220 grit. Gently sand the area where you will apply the adhesive. This creates tiny grooves for the adhesive to grip. Wipe away the dust with a dry cloth. The surface should now feel slightly rough. This texture helps the adhesive bond more effectively.
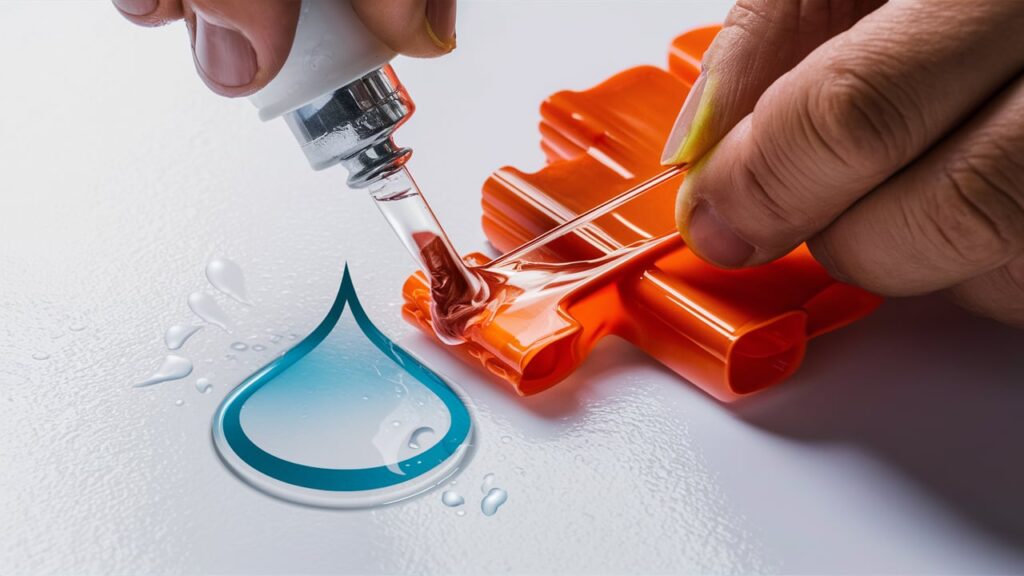
Applying The Adhesive
Applying the adhesive correctly is essential for a strong, long-lasting bond. This step ensures the plastic pieces stick together permanently. Follow these simple guidelines to achieve the best results.
Proper Techniques
Using the right techniques when applying adhesive can make a big difference. Here are some key points to consider:
- Clean the surfaces: Make sure the plastic pieces are clean and dry. Use a mild soap and water to remove dirt and grease. Dry thoroughly before applying adhesive.
- Apply evenly: Spread the adhesive evenly on the surface. Use a brush or applicator for best results.
- Press firmly: After applying the adhesive, press the plastic pieces together firmly. Hold them in place until the bond sets.
- Follow curing times: Allow the adhesive to cure as per the manufacturer’s instructions. This ensures a strong and durable bond.
Tools You’ll Need
Having the right tools can simplify the process. Here’s a list of tools you might need:
| Tool | Purpose |
|---|---|
| Brush or Applicator | For spreading the adhesive evenly |
| Clamps | To hold the pieces together while the adhesive sets |
| Cleaning Cloth | For cleaning the surfaces before applying adhesive |
| Safety Gloves | To protect your hands from the adhesive |
Using these tools can help you achieve a clean and strong bond. Remember to work in a well-ventilated area and follow all safety guidelines.
Clamping And Securing The Bond
Securing the bond between plastic surfaces is crucial. It ensures a lasting, waterproof seal. Clamping the materials together helps to achieve this. The pressure from the clamp ensures the adhesive spreads evenly. This helps in achieving maximum strength. Let’s dive into how to use clamps effectively. We will also look at some alternatives.
Using Clamps Effectively
Clamps are essential tools in bonding plastic. They keep the surfaces pressed tightly. Here are steps to use them effectively:
- Select the Right Clamp: Different clamps suit different projects. Choose one that fits your plastic size and shape.
- Apply Even Pressure: Place clamps at equal intervals. This ensures even pressure across the bond.
- Protect the Surface: Use soft pads on the clamp’s jaws. This prevents scratches on the plastic.
- Check Alignment: Ensure the plastic pieces are aligned before tightening the clamps.
- Allow Adequate Curing Time: Leave the clamps in place for the recommended time. Follow the adhesive manufacturer’s instructions.
Alternatives To Clamps
Sometimes, clamps may not be available. Or they may not fit the project. Here are some alternatives:
- Heavy Objects: Place weights or heavy objects on the plastic. Ensure they are stable and apply even pressure.
- Elastic Bands: Wrap elastic bands around the pieces. They provide good tension and hold the parts together.
- Tape: Use strong adhesive tape to secure the bond. Make sure the tape is tight and covers the entire seam.
- Temporary Screws: For thicker plastic, use screws. Drill small pilot holes and insert screws to hold the pieces together. Remove them once the adhesive cures.
Each method has its benefits. Choose the one that best fits your project needs.
Curing Time And Conditions
Understanding the curing time and conditions for bonding plastic with waterproof adhesives is crucial. Proper curing ensures a strong, long-lasting bond. Below, we break down the optimal environments and time recommendations for curing.
Optimal Curing Environments
Creating the right environment is key. Here are some factors to consider:
- Temperature: The ideal range is between 65°F and 80°F (18°C to 27°C).
- Humidity: Keep humidity levels between 40% and 60%.
- Ventilation: Ensure proper airflow to avoid moisture buildup.
Setting up a controlled environment can make a big difference. Use a thermometer and hygrometer to monitor conditions. Adjust as needed to maintain these levels.
Time Recommendations
Different adhesives have different curing times. Here is a general guide:
| Adhesive Type | Initial Set Time | Full Cure Time |
|---|---|---|
| Epoxy | 5-10 minutes | 24 hours |
| Cyanoacrylate (Super Glue) | 10-30 seconds | 24 hours |
| Polyurethane | 30 minutes | 24-48 hours |
Always follow the manufacturer’s instructions for the best results. Initial set time is the period before the adhesive can hold parts together. Full cure time is when the bond reaches maximum strength. Plan your project around these times to ensure a successful bond.
Testing The Bond Strength
Testing the bond strength of plastic adhesives is crucial. It ensures the bond will withstand various conditions and last long. This section provides a detailed guide on how to test the bond strength.
Methods To Test
There are several methods to check the bond strength. Here are the most common ones:
- Peel Test: This involves peeling the bonded surfaces apart and measuring the force required.
- Shear Test: This test measures the force needed to slide one surface over another.
- Tensile Test: This method pulls the bonded surfaces apart to test the adhesive’s strength.
Signs Of A Strong Bond
A strong bond should show the following signs:
- No Visible Gaps: The bonded area should have no gaps or bubbles.
- Even Distribution: The adhesive should be evenly distributed across the surface.
- High Resistance: The bond should resist water, heat, and stress.
| Test Method | Description |
|---|---|
| Peel Test | Peeling the surfaces apart to measure force. |
| Shear Test | Sliding one surface over another to test strength. |
| Tensile Test | Pulling the surfaces apart to measure adhesive strength. |
Troubleshooting Common Issues
Bonding plastic with waterproof adhesives can sometimes present challenges. Understanding common issues helps achieve a strong, lasting bond. This section will guide you through common problems and their solutions.
Bond Failure Causes
Several factors can lead to bond failure. Recognizing these causes ensures successful application.
| Cause | Description |
|---|---|
| Surface Contamination | Dirt, oil, or dust on the plastic prevents proper adhesion. |
| Incorrect Adhesive | Not all adhesives work well with all types of plastic. |
| Improper Curing | Insufficient drying time can weaken the bond. |
| Temperature | Extreme temperatures can affect the adhesive’s performance. |
Correcting Mistakes
Mistakes happen. Knowing how to correct them is crucial. Follow these steps to fix common problems:
- Clean the Surface: Remove any contaminants using a solvent. Let it dry completely.
- Select the Right Adhesive: Ensure the adhesive is compatible with the plastic type.
- Reapply Adhesive: Apply a thin, even layer of adhesive. Press the pieces together firmly.
- Allow Proper Curing: Follow the manufacturer’s instructions for drying time.
- Temperature Control: Work in a controlled environment to avoid extreme temperatures.
By understanding bond failure causes and knowing how to correct mistakes, you can achieve a strong, lasting bond. Proper preparation and following instructions are key to success.
Safety Precautions
Working with adhesives requires careful attention to safety. These substances can be harmful if not handled properly. Safety precautions are essential to avoid accidents or injuries. Here are some key measures to keep in mind:
Protective Gear
Wearing the right protective gear is crucial. Here are some essentials:
- Gloves: Use chemical-resistant gloves to protect your hands from adhesive contact.
- Safety Goggles: Wear goggles to shield your eyes from splashes and fumes.
- Respirator: A respirator can help you avoid inhaling harmful fumes.
- Apron: An apron can protect your clothes and skin from spills.
Handling Adhesives Safely
Adhesives can be dangerous if not handled properly. Follow these tips for safe handling:
- Read Labels: Always read the product label for specific instructions and warnings.
- Ventilation: Work in a well-ventilated area to avoid fume buildup.
- Storage: Store adhesives in a cool, dry place, away from children and pets.
- First Aid: Know the first aid procedures in case of accidental exposure.
Following these safety precautions ensures a safe and successful bonding process.
Frequently Asked Questions
How Do You Bond Plastic Permanently?
Use a waterproof adhesive designed for plastic. Clean the surfaces, apply the adhesive, and press them together firmly.
Which Adhesive Is Best For Plastic?
Epoxy and cyanoacrylate (super glue) are excellent for bonding plastic permanently and waterproofing the bond.
Can Waterproof Adhesives Bond All Types Of Plastic?
Most waterproof adhesives work well on common plastics like PVC, ABS, and polycarbonate. Check the adhesive label for compatibility.
How Long Does It Take For Plastic Adhesive To Dry?
Drying time varies by adhesive type. Some adhesives dry in minutes, while others take hours. Check the product instructions.
Conclusion
Bonding plastic with waterproof adhesives can be simple and effective. Follow the steps carefully. Choose the right adhesive for your project. Clean the surfaces well. Apply the adhesive evenly. Press the pieces together firmly. Allow proper drying time. Your plastic items will stay bonded and waterproof.
You can trust these methods for strong, lasting results. Happy bonding!