Learning how to use a brake bleeder kit is essential for car maintenance. It ensures your brakes function properly and safely.
Recommended Best Brake Bleeder Kit 2025
| Recommendation | Product |
| Best Overall | BILITOOLS 3L Vacuum Brake Bleeder Kit |
| Popular Choice | Orion Motor Tech Brake Bleeder Kit |
| Best Value | FOXWELL RT1000 Automatic Brake Bleeder Kit |
| Best Budget | Mission Automotive Easy-to-Use One Man Brake Bleeder Kit |
| Another Excellent Pick | DURATECH 2 in 1 Brake Bleeder Kit |
Bleeding your brakes removes air bubbles that can affect braking performance. Using a brake bleeder kit makes this task easier and more efficient. Whether you’re a seasoned DIY mechanic or a car maintenance newbie, understanding how to use this tool can save you time and money.
This guide will walk you through the steps to use a brake bleeder kit correctly. You’ll learn the tools you need, safety precautions, and the process to follow. By the end, you’ll feel confident in maintaining your vehicle’s brake system. Let’s get started!
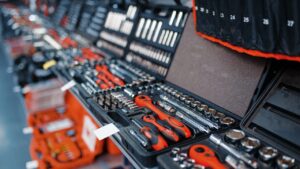
Tools And Materials
Using a brake bleeder kit is crucial for maintaining your vehicle’s braking system. To ensure a smooth process, you need specific tools and materials. This section covers the essential tools and additional materials required.
Essential Tools
First, you need a brake bleeder kit. This kit usually includes a vacuum pump, a reservoir, and various adapters. The vacuum pump removes air from the brake lines. The reservoir collects the old brake fluid. Adapters fit different vehicle models.
You also need a wrench set. Wrenches help you loosen and tighten brake line fittings. A wrench set with various sizes is useful.
A clear plastic hose is necessary. This hose connects the bleeder valve to the reservoir. It allows you to see the fluid flow and any air bubbles.
Lastly, have a jack and jack stands. These tools lift your vehicle safely. You need to access the brake system, so lifting is essential.
Additional Materials
Fresh brake fluid is crucial. Make sure to use the correct type for your vehicle. Check your owner’s manual for specifications.
Rags or paper towels are helpful. Use them to clean any spills and keep the area tidy.
Safety goggles protect your eyes. Brake fluid can be harmful if it splashes.
A container for old fluid is needed. Dispose of old brake fluid responsibly. Do not pour it down the drain.
Having a friend to help can make the job easier. They can pump the brake pedal while you monitor the fluid flow.
Preparation Steps
Gather all necessary tools and materials beforehand. Ensure the brake bleeder kit and brake fluid are ready. Familiarize yourself with the car’s brake system.
When you’re ready to use a brake bleeder kit, preparation is key. It’s not just about having the right tools; it’s also about setting up everything correctly to ensure a smooth process. This section will guide you through the preparation steps, ensuring you’re well-equipped to handle the task efficiently.
Safety Precautions
Safety should always be your top priority. Begin by wearing gloves and safety glasses. Brake fluid is corrosive and can damage your skin and eyes.
Make sure the car is on a flat surface. This ensures stability and prevents any unwanted movement.
Always have a fire extinguisher handy. While it’s unlikely you’ll need it, it’s better to be safe than sorry.
Vehicle Setup
First, lift the vehicle using a jack and secure it with jack stands. Never rely solely on the jack to hold the vehicle up. This is crucial for your safety.
Next, remove the wheels to access the brake components. This might seem like a hassle, but it’s necessary for a thorough job.
Locate the brake bleeder valves. These are usually at the back of the brake calipers. Knowing their location beforehand saves you time and frustration.
By following these preparation steps, you’re setting yourself up for success. What other tips or tricks do you have for preparing to bleed brakes? Share in the comments below!
Locating Brake Components
When you’re using a brake bleeder kit, understanding where to find the key brake components is essential. Knowing the location of these parts will make the bleeding process smoother and more efficient. Let’s dive into the main components you need to locate: the brake master cylinder, brake lines, and calipers.
Brake Master Cylinder
The brake master cylinder is the heart of your vehicle’s braking system. You can usually find it under the hood, mounted on the firewall directly in front of the driver’s seat. Look for a small, rectangular reservoir with a plastic cap.
Ensure the brake fluid level is adequate before beginning the bleeding process. Low fluid levels can introduce air into the system, making your job harder. Always use the brake fluid type specified in your vehicle’s manual.
Brake Lines And Calipers
Brake lines connect the master cylinder to each wheel’s brake calipers. These lines are typically made of metal or reinforced rubber and run along the underside of your vehicle. You may need to lift your vehicle safely using a jack and jack stands to access them.
The brake calipers are located at each wheel. They house the brake pads and are responsible for squeezing them against the rotors to stop your car. Identifying the bleeder screws on the calipers is crucial, as this is where you’ll attach your brake bleeder kit.
Is your vehicle’s braking system different from what we’ve described? Consult your owner’s manual or a professional mechanic for guidance. Knowing exactly where these components are will save you time and frustration.
Have you ever struggled to locate these components in your vehicle? Share your experiences in the comments below. Your tips could help fellow readers tackle their brake bleeding tasks more efficiently.

Using The Brake Bleeder Kit
Using a brake bleeder kit helps maintain your vehicle’s braking system. It removes air bubbles from the brake lines. These bubbles can lead to spongy brakes. Let’s dive into the process of using the brake bleeder kit.
Attaching The Kit
First, locate the brake bleeder valve on the brake caliper. It is usually at the top. Clean the area around the valve. This keeps dirt from entering the brake system.
Next, attach the hose from the bleeder kit to the valve. Ensure it fits tightly. A loose connection can let air in. This defeats the purpose of bleeding the brakes.
Place the other end of the hose into a clear container. This container will collect the old brake fluid. Make sure the container is secure and will not tip over.
Bleeding Process
Begin by opening the brake bleeder valve slightly. Ask a friend to pump the brake pedal slowly. They should press it down and hold. You will see fluid and bubbles flow through the hose.
Keep an eye on the fluid level in the reservoir. Do not let it run dry. This can pull more air into the system. Add new brake fluid as needed.
Continue this process until you no longer see bubbles in the fluid. This means the air is removed from the brake lines. Tighten the bleeder valve and remove the hose.
Repeat this process for each wheel. Start with the wheel farthest from the brake fluid reservoir. Usually, this is the rear passenger side. Move to the rear driver side, front passenger side, and finally the front driver side.
Once all wheels are done, check the brake pedal. It should feel firm, not spongy. If not, you may need to repeat the process. Ensure all valves are tightly closed.
Checking For Air Bubbles
Ensuring your vehicle’s braking system is free from air bubbles is crucial for safety and performance. Using a brake bleeder kit effectively can make this task straightforward. Let’s explore how to identify and eliminate air bubbles during the brake bleeding process.
Identifying Air In Lines
One of the first steps in checking for air bubbles is identifying air in your brake lines. Air bubbles can cause a spongy feeling when you press the brake pedal. This happens because air compresses, unlike brake fluid.
To spot air bubbles, keep an eye on the fluid being pushed through the lines. If you see tiny bubbles in the fluid, there’s air in your system. This is a clear sign that your brakes need more bleeding.
Ensuring Complete Bleeding
Complete bleeding ensures no air remains in the brake lines. Start from the brake furthest from the master cylinder and work your way closer. This method ensures you push all the air out.
Keep bleeding until you see clear, bubble-free brake fluid. It might take several attempts, but patience is key. Remember, the goal is to have only brake fluid in the lines.
After bleeding, test the brake pedal. If it feels firm, you’ve likely eliminated the air. A soft pedal indicates that more bleeding is needed.
Have you ever had a spongy brake pedal? What steps did you take to fix it? Share your experience in the comments below!
Post-bleeding Inspection
After you’ve bled your brakes, the job isn’t quite over yet. A thorough post-bleeding inspection is crucial to ensure everything is functioning correctly. This step can be the difference between smooth, safe driving and unexpected brake issues.
Testing Brake Pedal
Start by testing your brake pedal. Sit in the driver’s seat and press down on the brake pedal several times.
The pedal should feel firm and responsive. If it feels spongy or sinks to the floor, there might still be air in the brake lines. You may need to repeat the bleeding process.
Once the pedal feels right, take a short drive in a safe area. Pay close attention to how the brakes respond. Do they engage immediately, or is there a delay? A delay could indicate a problem that needs addressing.
Inspecting Brake Fluid Level
Next, inspect your brake fluid level. Open the hood and locate the brake fluid reservoir. It’s typically found near the back of the engine bay, close to the driver’s side.
Check the fluid level against the marked indicators on the reservoir. The fluid should be between the minimum and maximum lines. If it’s low, add the appropriate brake fluid type as specified by your vehicle’s manual.
Keep an eye out for any leaks around the reservoir or brake lines. Leaks can cause a drop in fluid levels and lead to brake failure. If you notice any leaks, address them immediately.
Have you ever found yourself in a situation where your brakes felt off after bleeding them? How did you handle it? Share your experiences and let’s ensure everyone drives safely with properly functioning brakes.
Common Mistakes
Bleeding your brakes is essential for vehicle safety. But many make common mistakes. These errors can compromise the process and your car’s braking performance.
Avoiding Contamination
Contamination is a major problem during brake bleeding. Ensure all tools and fluid are clean. Dirt or old fluid can enter the brake system. This can cause brake failure. Always use fresh brake fluid from a sealed container. Store your brake fluid properly. It should not be exposed to air or moisture.
Before starting, clean the bleeder valve. Use a clean rag and brake cleaner. This removes dirt and debris. Contaminants in the valve can enter the brake lines. This leads to poor brake performance. Cleanliness is key for effective brake bleeding.
Proper Kit Usage
Using the brake bleeder kit correctly is crucial. Many people do not follow instructions. This can lead to air bubbles in the brake lines. Air in the lines reduces brake efficiency. Always refer to the kit’s manual for guidance.
Ensure all connections are tight. Loose connections can let air into the system. Double-check all fittings before you start. Use the correct size wrench for the bleeder valve. Using the wrong size can damage the valve. This makes it difficult to achieve a proper seal.
Follow the correct bleeding sequence. Start with the wheel farthest from the master cylinder. Move to the next farthest wheel. This ensures all air is removed from the system. Proper sequence enhances brake performance.
Maintenance Tips
Maintaining your brake bleeder kit is crucial for ensuring it remains in top condition and ready to use when you need it. Proper upkeep can save you time and money while ensuring your vehicle’s braking system remains efficient and safe. Let’s dive into some practical maintenance tips that will help you get the most out of your brake bleeder kit.
Regular Brake Checks
Regular checks of your vehicle’s brakes are essential. A brake bleeder kit is a fantastic tool for this, but it needs to be used correctly and at the right intervals. Make it a habit to inspect your brakes every few months or after any long trips.
Look out for signs of wear and tear, like squeaking or grinding noises. Check the brake fluid levels regularly. Low levels can indicate a leak or the need for a brake fluid change. Use your brake bleeder kit to ensure there’s no air trapped in the brake lines, as this can significantly affect braking performance.
Remember, your brakes are a critical safety feature. Never put off a brake check if you suspect something is wrong. A small time investment can prevent bigger, costlier issues down the road.
Storing The Brake Bleeder Kit
Proper storage of your brake bleeder kit is just as important as knowing how to use it. Always clean the kit thoroughly after each use. Residual brake fluid can damage the components and reduce the kit’s effectiveness.
Store the kit in a dry, cool place. Avoid areas that are prone to moisture or extreme temperatures, as these conditions can cause rust or other damage. Organize the parts neatly to prevent any loss or damage.
Think about how you store other car maintenance tools. Are they in a dedicated space where you can easily find them? Applying the same principles will ensure your brake bleeder kit is always ready to go when you need it.
What’s your experience with brake maintenance? Have you faced any challenges in storing or using your brake bleeder kit? Share your thoughts in the comments below. Your insights could help someone else navigate their brake maintenance journey.
Frequently Asked Questions
How Does A Brake Bleeder Kit Work?
A brake bleeder kit removes air bubbles from the brake system. It creates pressure to push brake fluid through the lines. This ensures effective braking performance.
How To Use A One Person Brake Bleeder Kit?
Attach the brake bleeder kit to the bleeder valve. Pump the brake pedal to build pressure. Open the valve to release air and fluid. Close the valve and repeat until no air bubbles appear. Refill the brake fluid reservoir as needed.
Do You Bleed Brakes With The Master Cylinder Cap On Or Off?
Bleed brakes with the master cylinder cap off. This prevents air from entering and ensures proper fluid flow.
In What Order Should You Bleed The Brake Lines?
Bleed the brake lines in this order: right rear, left rear, right front, left front. Always follow your vehicle’s manual.
Conclusion
Using a brake bleeder kit is simple and effective. It helps maintain your vehicle’s braking system. Follow the steps carefully for best results. Ensure all tools are ready before starting. This prevents any delays or issues. Regular maintenance extends the life of your brakes.
It also ensures safety on the road. Practice makes the process easier over time. Soon, you’ll feel more confident. Keep your kit clean after each use. This ensures it works well next time. So, keep up with brake maintenance. Your car will thank you!