Two to three coats of clear coat are usually enough for headlights. This ensures protection and a shiny finish.
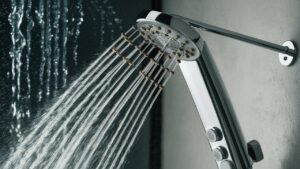
But why is this important? Clear coating headlights can make a big difference. It protects them from UV rays, rain, and dirt. Over time, headlights can become foggy and dull. This affects visibility while driving. Applying the right number of clear coats can restore their shine and protect them.
Recommended Best Clear Coat for Headlights 2025
| Recommendation | Product |
| Best Overall | Meguiar’s Keep Clear Headlight Coating |
| Popular Choice | SYLVANIA Headlight Restoration |
| Best Value | Chemical Guys Headlight Restore |
| Best Budget | Rust-Oleum 2X Ultra Cover Spray Paint |
| Another Excellent Pick | CERAKOTE Ceramic Headlight Restoration Kit |
It also extends their lifespan. In this blog, we’ll explore why two to three coats are ideal. We’ll also look into the process of applying clear coat. This guide will help you maintain your headlights better. Keep reading to learn more about keeping your headlights clear and bright.
Understanding Clear Coat
Clear coat is an important part of headlight maintenance. It protects your headlights and keeps them clear. Applying the right amount can save you money and time.
What Is Clear Coat?
Clear coat is a transparent paint layer. It goes on top of your headlights. This layer protects the headlights from damage. It shields against UV rays, dirt, and scratches.
Clear coat is made from a mix of chemicals. These chemicals form a hard, protective barrier. It is similar to the clear coat used on car paint. But it is specially made for headlights.
Benefits For Headlights
Clear coat has several benefits for headlights. First, it prevents yellowing. UV rays can turn headlights yellow over time. Clear coat stops this from happening.
Second, clear coat protects against scratches. Tiny rocks and debris can scratch headlights. The clear coat acts as a shield. This keeps your headlights smooth and clear.
Third, it makes cleaning easier. Dirt and grime do not stick easily. This means you can clean your headlights with less effort.
Finally, clear coat improves visibility. Clear headlights allow more light to pass through. This means better visibility at night. It makes driving safer.
Preparation
Preparation is key for applying clear coat on headlights. Proper preparation ensures the best results. This section will guide you through the steps required before applying the clear coat.
Cleaning The Headlights
First, clean your headlights thoroughly. Use a mild soap and water. Remove all dirt and grime. Dry the headlights with a clean, soft cloth. This step prevents imperfections in the clear coat.
Gathering Necessary Tools
Next, gather all the necessary tools. You will need sandpaper, painter’s tape, and a clear coat spray. Ensure you have a clean, well-ventilated workspace. Having everything ready saves time and effort.
Application Process
The application process for clear coat on headlights is crucial for achieving a smooth and durable finish. It involves precise steps that ensure your headlights remain clear and protected. Follow these detailed instructions to get the best results.
Applying The First Coat
To begin, ensure your headlights are clean and free of dust. Use a lint-free cloth to wipe them down. This step is essential to prevent particles from becoming trapped under the clear coat.
Shake the clear coat can vigorously for about a minute. This helps in mixing the contents evenly. Hold the can about 6-8 inches away from the headlight and spray a light, even coat. Move the can in a steady, sweeping motion to avoid drips and runs.
Tip: Apply the first coat lightly. This will help the subsequent coats adhere better.
Drying Time Between Coats
Allow the first coat to dry completely before applying additional coats. This usually takes about 10-15 minutes. Drying time can vary based on humidity and temperature.
Check the surface by lightly touching a corner of the headlight. If it feels dry, you can proceed with the next coat. If it feels tacky, wait a bit longer.
Repeat the process for each additional coat. Typically, 2-3 coats are sufficient for optimal protection and shine. Ensure each coat dries thoroughly before applying the next.
Note: Too many coats can cause a cloudy finish. Stick to 2-3 coats for the best results.
| Step | Action |
|---|---|
| 1 | Clean headlights |
| 2 | Shake clear coat can |
| 3 | Apply first light coat |
| 4 | Allow to dry (10-15 minutes) |
| 5 | Apply additional coats as needed |
Number Of Coats
Applying the right number of clear coat layers to your headlights is crucial. It ensures durability, shine, and protection from UV rays. Too few coats may leave the headlights vulnerable. Too many coats can lead to a cloudy finish.
Recommended Number Of Coats
Experts usually recommend applying two to three coats of clear coat on headlights. This range provides adequate protection and a smooth finish. The first coat establishes a base layer. The second coat ensures full coverage. A third coat, if applied, adds extra protection and shine.
Factors Influencing Coat Quantity
Several factors can influence the number of coats needed:
- Headlight Condition: New headlights may need fewer coats. Old or damaged headlights might need more.
- Environmental Exposure: Cars in sunny or harsh environments benefit from an extra coat.
- Application Method: Spray cans and airbrushes may apply differently. Consistency matters.
- Clear Coat Quality: High-quality clear coats often need fewer applications.
Consider these factors to determine the optimal number of coats for your car’s headlights. Proper application ensures longevity and clarity.
Common Mistakes
Applying a clear coat to your headlights is essential. It ensures they stay clear and bright. However, many make mistakes during this process. These mistakes can lead to unsatisfactory results. Here are some common mistakes to avoid.
Over-application
Over-application of the clear coat is a frequent error. Applying too many layers can cause several problems:
- Drips and Runs: Excessive layers can lead to unsightly drips and runs.
- Uneven Surface: Too much clear coat may result in an uneven, bumpy surface.
- Wasting Materials: Using more clear coat than necessary is wasteful.
It’s best to apply a few thin coats. Typically, 2-3 coats are sufficient.
Insufficient Drying Time
Another common mistake is not allowing enough drying time between coats. This can cause issues such as:
- Sticky Surface: The layers may remain sticky and attract dirt.
- Poor Adhesion: The clear coat may not adhere properly, reducing durability.
- Cloudy Finish: Rushing the process can result in a cloudy or hazy finish.
Always allow adequate drying time between coats. Follow the manufacturer’s recommendations.
Maintenance Tips
Maintaining clear headlights is crucial for safe driving. Clear coat protection helps maintain visibility. Regular upkeep ensures the longevity of your headlights.
Regular Cleaning
Headlights gather dirt and grime over time. Regular cleaning helps maintain their brightness. Use a mild soap and water solution. Gently scrub the headlights with a soft cloth. Avoid abrasive materials to prevent scratches.
Rinse thoroughly with clean water. Dry with a microfiber cloth to avoid streaks. Clean headlights monthly for best results. Proper cleaning enhances visibility and safety on the road.
Reapplying Clear Coat
Clear coat wears off over time. Reapply to protect the headlights. Start by cleaning the headlights thoroughly. Ensure they are dry before applying the clear coat. Use a clear coat spray designed for headlights.
Apply in thin, even layers. Allow each coat to dry before adding another. Typically, two to three coats suffice. This ensures maximum protection and shine. Reapply clear coat every six months.
Regular maintenance extends the life of your headlights. Clean and reapply clear coat as needed. This keeps your headlights clear and bright, ensuring safer driving conditions.
Frequently Asked Questions
How Many Clear Coats Should I Apply On Headlights?
Typically, 2-3 coats of clear coat are recommended. This ensures adequate protection and a glossy finish. Allow each coat to dry before applying the next.
Why Apply Clear Coat To Headlights?
Clear coat protects headlights from UV damage and oxidation. It also enhances clarity and shine, improving overall visibility and appearance.
How Long Should I Wait Between Coats?
Wait about 10-15 minutes between each clear coat application. This allows the previous layer to partially dry and ensures proper adhesion.
Can I Use Any Clear Coat For Headlights?
Use clear coat specifically designed for automotive plastics. This ensures compatibility and long-lasting protection for your headlights.
Conclusion
Applying the right number of clear coat layers on headlights is crucial. Too few coats may offer less protection. Too many can lead to cloudiness. Typically, two to three coats work best. This ensures good coverage and durability. Always let each layer dry properly.
This helps achieve a smooth finish. Remember, patience and attention to detail matter. Clear headlights enhance both safety and appearance. Keep them well-maintained for a better driving experience. Happy driving!